• Skip to primary navigation
  • Skip to main content
  • Skip to primary sidebar
Average But Inspired logo - DIY and craft

Average But Inspired

Craft a home you love. DIY and craft tutorials.

  • About
    • Contact Me
    • Disclosures
    • Privacy Policy and Copyright Policy
  • DIY
    • Furniture
  • Crafts
    • Dollar Store Crafts
    • Seasonal
      • Patriotic & Summer
      • Valentine’s Day
      • Easter & Spring
      • Fall & Halloween
      • Christmas & Winter
  • Home Decor
    • Organization
  • Shop
    • DIY Swag
    • DIY Guides
  • Home

Holiday

Spring Bunny Flower Pot Gumball Machine

March 7, 2016 by Bre 24 Comments

This DIY flower pot gumball machine craft is the perfect Easter decor or spring decoration to make!

Last Christmas I saw photos of tiny toy trucks and mini Christmas trees in old gumball machines.  They were absolutely adorable and it was an idea that I loved!  I have been hunting for the perfect gumball machine since then, but haven’t stumbled upon the right one just yet.  

But that’s okay because for my Easter decor I made my own flower pot gumball machines with the cutest little bunnies!  They’re so fun to make and just as cute as real gumball machines!  

Adorable! Make these bunny gumball machines for your Easter decor or spring decor this year! Click through for the full tutorial and supply list.

I mean, come on!  These are cute, right?

Supplies for Spring Bunny Gumball Machine

Some of these links are affiliate links.  Please read my disclosure policy for more information.

  • Small terracotta pots
  • Small candy jars with lids 
  • Small wood finials or drawer knobs
  • Strong, multi-purpose glue
  • Craft paint (the type of paint I used is no longer available. Substitute with a matte finish acrylic paint for the same look – this yellow craft paint and this light blue craft paint will be great)
  • Foam brush
  • Foam bunnies (I bought mine at Michaels but they don’t have them online.  Linked bunnies are similar.  Pull them off the floral pick stick for this project.)
  • Floral moss
  • Hot glue and glue gun
  • Decorative spring ribbon

Instructions for Making a Flower Pot Gumball Machine

Begin by painting the flower pot, candy jar lid, and wooden knob with craft paint of your choice. A multi-surface craft paint will work best since you’re covering different types of surfaces.

Adorable! Make these bunny gumball machines for your Easter decor or spring decor this year! Click through for the full tutorial and supply list.

Next, place floral moss into the bottom of the candy jar.

Here’s another adorable DIY spring flower pot craft you can make!

Adorable! Make these bunny gumball machines for your Easter decor or spring decor this year! Click through for the full tutorial and supply list.

Put hot glue onto the bottom of the foam bunnies and press them into the floral moss that’s in the bottom of the candy jar.

Adorable! Make these bunny gumball machines for your Easter decor or spring decor this year! Click through for the full tutorial and supply list.

Screw the lid on the candy jar, and glue the finial or knob to the top.  

Adorable! Make these bunny gumball machines for your Easter decor or spring decor this year! Click through for the full tutorial and supply list.

Flip the dry, painted flower pot over and cover the bottom with glue. I used a strong multi-surface glue, which is my favorite for adhering all kinds of things – even glass and terra cotta!

Adorable! Make these bunny gumball machines for your Easter decor or spring decor this year! Click through for the full tutorial and supply list.

Press the candy jar onto the glue and let it sit, untouched, for the time indicated on the glue packaging.  This will make sure that the glass and terra cotta properly bond to one another.  

Add some decorative ribbon where the two meet for a cute, final touch!

Adorable! Make these bunny gumball machines for your Easter decor or spring decor this year! Click through for the full tutorial and supply list.

I just love this little DIY spring decor project!  

Adorable! Make these bunny gumball machines for your Easter decor or spring decor this year! Click through for the full tutorial and supply list.

I kept one for myself and am bringing the other to my elderly neighbor this week. She will probably be like “what is this?!?” but hopefully it will bring her some Easter cheer, nonetheless!

Adorable! Make these bunny gumball machines for your Easter decor or spring decor this year! Click through for the full tutorial and supply list.

What do you think about my spin on the gumball machine decor idea?  

Adorable! Make these bunny gumball machines for your Easter decor or spring decor this year! Click through for the full tutorial and supply list.

Will you be making a flower pot gumball machine for yourself this spring or Easter?

Filed Under: Crafts, Dollar Tree, Easter, Holiday

10 Minute DIY Bunny Wreath {Video Tutorial}

February 27, 2016 by Bre Leave a Comment

blank

Learn how to make an adorable DIY bunny wreath with Deco Mesh and dollar store supplies!

Easter will be here soon!  Can you believe it?  (We have snow on the ground and I’m thinking about Easter.  It doesn’t seem right.)

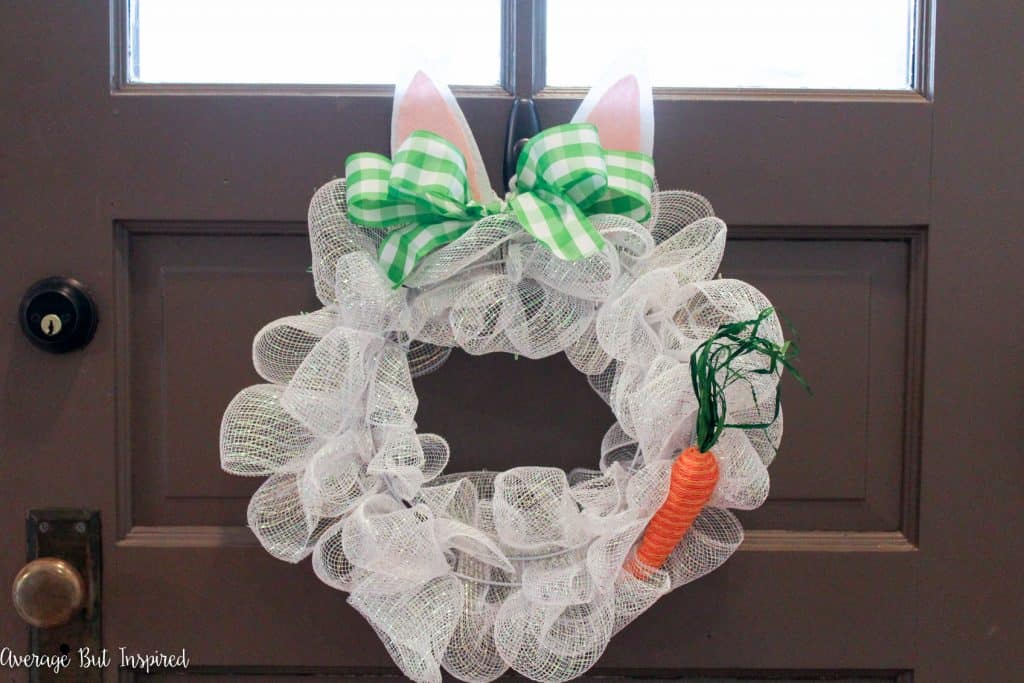
Anyway, because it will be here before we know it, I don’t think it’s too early to share this adorable 10 minute DIY bunny wreath with you!   

Adorable! This DIY Bunny Wreath is a perfect addition to your Easter decor or spring decor! Plus, a video tutorial makes it easy to make on your own!

DIY Bunny Wreath Supplies

These are the supplies I used to make the bunny wreath as shown in this post. Feel free to modify them to fit your needs! Also, this post contains affiliate links. Please read my full disclosure policy for more information.

12″ wire wreath form (white or spray painted white)

White stiffened felt

Light pink craft felt

Iridescent white deco mesh

White pipe cleaners

Floral pick carrot

Wired ribbon

Fabric scissors

Hot glue gun

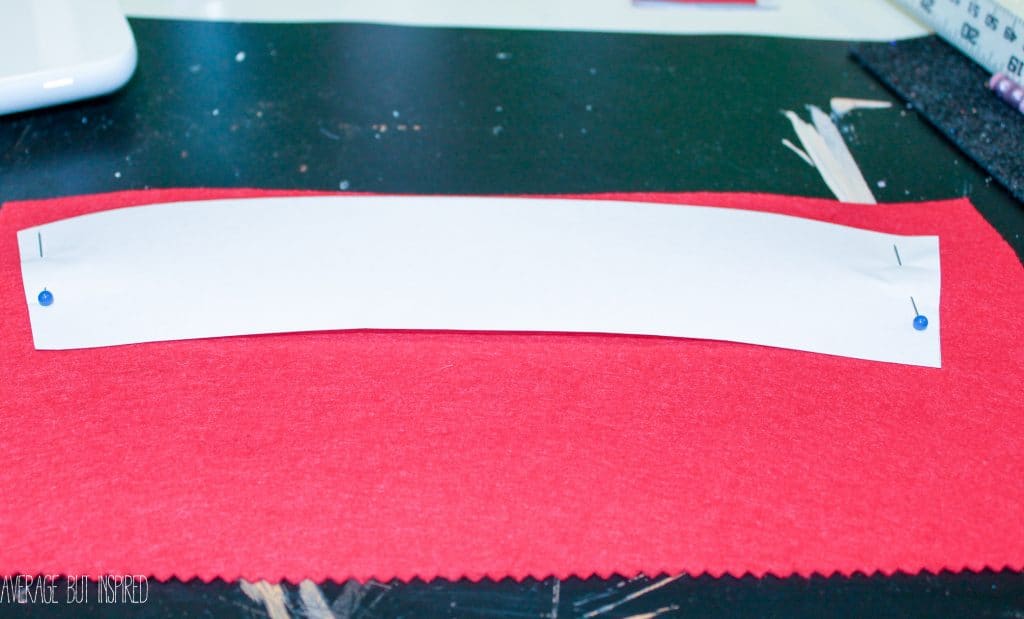
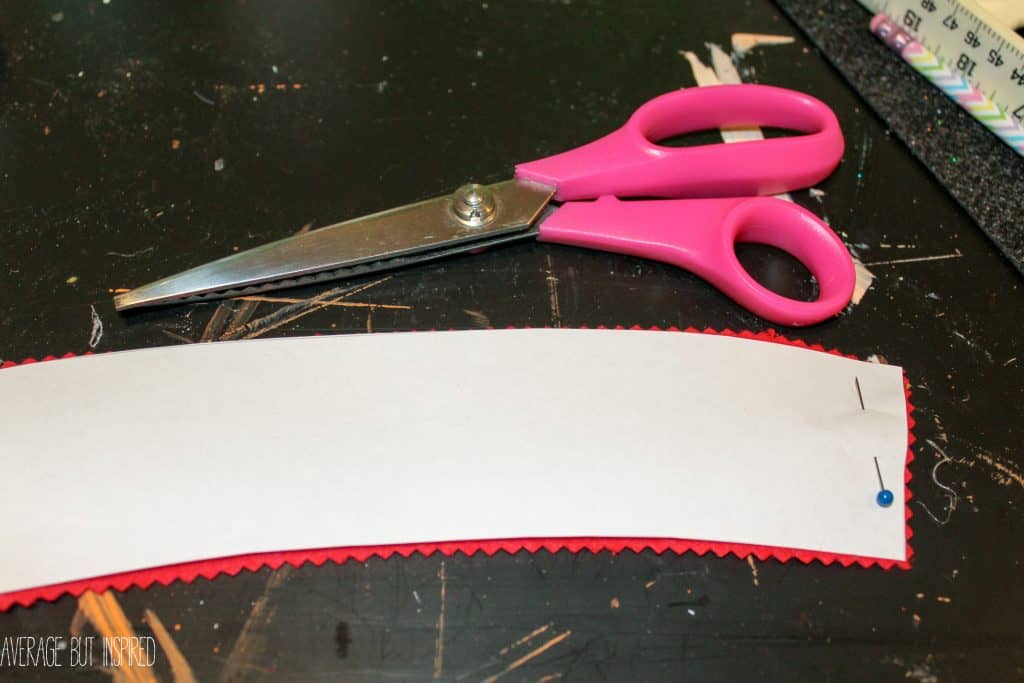
One quick word on the felt I used for this DIY spring wreath: stiffened felt is what you need for the base layer of the ears (the white part) because it holds it shape. If you use regular felt, the ears will be floppy and not stand up properly.

You can use regular craft felt for the inner pink part of the bunny ears, but you definitely want stiffened felt for the outer part!

Note that this could absolutely be a DIY Dollar Tree Easter wreath! Instead of using felt for the ears, use a Dollar Tree bunny ears headband!

DIY Easter Bunny Wreath Tutorial

To make your own bunny wreath for spring or easter, you’ll only need around ten minutes. Really!

Now, unlike my usual practice, I only made a video tutorial for this project. I felt like it’s a little easier to see the process of making the wreath by watching it.

(And please know that I made this video in 2016. It’s now 2023 and my video skills have drastically improved!)

If you prefer a written tutorial, you might enjoy another Easter wreath project I made – this adorable egg tray wreath!

The video is posted on my Facebook page – right here!  Simply click over to check it out! (And hey, maybe you’d like to follow along while you’re there!)

Adorable! This 10 Minute Bunny Wreath is a perfect addition to your Easter decor or spring decor! Plus, a video tutorial makes it easy to make on your own!

Once you watch it and become convinced that you must make your own, come back here to download the FREE bunny ears template

Bunny Ears Template

Download the FREE template for the outer and inner bunny ears right here!

Thanks for watching and “hoppy” creating!

Filed Under: Easter, Holiday

DIY Valentine Gift: Make a Heart Wood Slice

January 25, 2016 by Bre 13 Comments

blank

Looking for ideas for a DIY Valentine gift for him? Use a wood slice to make a meaningful reminder of your love!

I had a dream that my husband and I were strolling through a magical-looking forest with a picnic basket – searching for the perfect romantic spot for lunch.  Once we found it,  we spotted a beautiful tree where we carved a heart and our initials, just like I’d imagine they do in those romance novels I’ve never read.  We decided it will be our special secret place forever.

Um . . . what was that about?

I’m lucky if I see a few trees a day where I live.  There is NO heart carving going on around here!  But I do think it’s a super sweet, romantic, and sentimental idea, so I decided to improvise!  

And now I’m sharing the details on how to make a “carved” heart wood slice in case you like the idea, too.  Hey – Valentine’s Day is just around the corner, so this could be a sweet DIY gift for that!  Or even for an engagement, wedding, or anniversary!  

Looking for an adorable idea for a DIY Valentine's Day gift or Valentine's Day decor? Use a wood slice to make a replica of a tree carving with your initials and a special date. This look is made with a wood burning tool and is perfect for all skill levels.

Supplies Needed to Make a DIY Valentine’s Day Gift of a Heart Wood Slice

Some of these links are affiliate links.  You can read my full disclosure policy for more information.

  • Medium wood slice (sometimes referred to as basswood)
  • Wood burning tool
  • Pencil
  • Metallic Lustre in Rose Gold
  • Lint-free cloth
  • Sawtooth picture hanger or small easel

How to Make a DIY Valentine Gift of a Heart Wood Slice

First up, draw your design on the wood slice with your pencil.  It doesn’t have to be perfect because I doubt you’d be able to carve a perfectly shaped heart if you were out there in the woods doing this.  Make it look sort of authentic, ok?

I filled the inside of the heart with my husband’s and my first initials, and then outside of the heart I put our wedding date. (I’m aging myself here, people!)

Draw a design onto a craft wood slice to make a cute and sentimental Valentine's Day gift for him.

Next, go over the penciled design with your heated wood burning tool. (These tools are REALLY cheap and easy to use – seriously!)  You do not have to have any prior experience using a wood burning tool.  It is so simple!  

Use a wood burning tool to engrave a heart on a wood slice.

Gently erase any pencil lines that didn’t get burned or engraved, and make sure all of the eraser shavings are removed from the wood slice.  

If you erase too hard, you’ll leave white marks or discolorations on the wood slice, so be careful!

Using a wood burning tool on a craft wood slice to make a DIY Valentine's Day gift.

Then, using the lint-free cloth, fill in the heart with the Metallic Lustre to make it stand out a bit more.  Just rub it in there and give it some good shimmer!

You could also use a very thin coat of craft paint, and it would likely be best to water it down so that you don’t obscure the wood burned initials inside of the heart.

Use Metallic Luster inside the wood burned heart to add some Valentine's Day color.

And that’s it! Pop it onto a little easel or add a sawtooth picture hanger to the back if you want it on the wall.  

Cute! This DIY Carved Heart Wood Slice is a quick and easy project that's a perfect Valentine's Day gift, anniversary gift, wedding or engagement gift! Get the full tutorial here!

I showed this to my husband and he said, “aw.”  Then I asked him if he would take it to work and display it in his office.  He looked at me like I have three heads, so I pretended to be sad and offended.  He still hasn’t taken it to work. . .

Filed Under: Holiday, Valentine's Day

Santa’s Stationery {Free Santa Stationery Printable}

December 18, 2015 by Bre 8 Comments

blank

Last month my mom found an old letter that Santa had left me when I was very young.  (Check out this picture of it that I posted on Instagram.)  

It was beautifully written in red calligraphy and was made to look as though it were on aged paper.  I had no memory of receiving it when I was little, but it made me SO happy to see it now as an adult.

And of course it made me want to have Santa leave my children a special note.  Problem is I don’t know calligraphy and there’s no way I’m going to successfully dye paper to look like it’s old (trust me on that one.).  

So I hopped onto the computer one night and created my own version of Santa’s Stationery – some letterhead and a thank you note from the big man in red.  (Hey – when you’re important, you definitely have custom stationery.)

Kids will LOVE receiving a note from the big man himself on his custom stationery! Download this free Santa Stationery and print at home! Write a special note on the letterhead or check the right boxes on the thank you note. It will be a great memory maker!

You can download the free Santa Stationery Printables near the end of this post!  They’re super cute and will lend some authenticity to any note Santa might leave your little one(s) – even if you don’t know calligraphy!

Kids will LOVE receiving a note from the big man himself on his custom stationery! Download this free set of Santa's Stationery and print at home! Write a special note on the letterhead or check the right boxes on the thank you note. It will be a great memory maker!

After I printed out my letterhead and thank you notes, I tried to write all fancy like Santa would.  It looked ridiculous.  I’m not even going to show you the full note.  Womp womp.  

Kids will LOVE receiving a note from the big man himself on his custom stationery! Download this free set of Santa's Stationery and print at home! Write a special note on the letterhead or check the right boxes on the thank you note. It will be a great memory maker!

I was much better at checking the boxes on the thank you note. (But even my x’s look a little sloppy.). I might have to re-print and try again later.

Kids will LOVE receiving a note from the big man himself on his custom stationery! Download this free set of Santa's Stationery and print at home! Write a special note on the letterhead or check the right boxes on the thank you note. It will be a great memory maker!

Click if you’d like to download a free set of Santa’s thank you notes.

Kids will LOVE receiving a note from the big man himself on his custom stationery! Download this free set of Santa's Stationery and print at home! Write a special note on the letterhead or check the right boxes on the thank you note. It will be a great memory maker!

And if you’d like to download Santa’s letterhead, do it right here.

No matter what you end up writing in your letter, or what boxes you end up checking, I hope you and your loved ones have a wonderful and magical Christmas together.

Enjoy the time spent in each other’s company and make memories that you will cherish for a lifetime. I know I will be doing that. (And then I will be practicing my calligraphy.)

Check Out My Other Christmas Crafts and Christmas DIYs!

blank

Filed Under: Christmas, Holiday

How to Make a No-Sew Coffee Sleeve

December 7, 2015 by Bre 16 Comments

blank

A DIY Coffee Sleeve makes a fantastic gift – especially when paired with a travel mug and coffee! Learn how to make no-sew coffee sleeves with felt in this post.

“Oh!  Oh, kids!  Santa definitely came to our house last night.  Wait until you see what’s under this tree!”

I remember those words like they were spoken yesterday.  Sitting at the top of the stairs, my brother, sister and I would wait anxiously to run down and see all of the beautifully-wrapped packages that were just waiting to be torn open.

But first we had to wait there on those stairs – gifts out of sight and our anticipation building as my dad gathered trash bags (poor guy always had trash duty – but I think it was a job he relished), and turned on the holiday cassettes (or cd’s as we got older), and my mom made the coffee.  

Once the aroma started to waft up the staircase, we knew it was almost time for the best morning of the year to begin.

When we got the go-ahead, we bounded down the stairs with enthusiasm unlike any other.

Holiday traditions are made merrier this Christmas.

Yes, that’s me (and my Pound Puppy).  I’m probably seven years old in that photo.  Of course I can’t remember what I got for Christmas that year, but I can remember the build up to it clearly.  The sights, the sounds, and the smells – all of them forming the basis of family traditions I carry forward with my own family today.

Holiday traditions are made merrier this season with help from Starbucks.

This shop has been compensated by Collective Bias, Inc. and its advertiser. All opinions are mine alone. #MakeItMerrier #CollectiveBias

Most of those traditions start as soon as Thanksgiving has passed.  We decorate the tree together, read our ever-growing collection of holiday books (almost always with a cup of coffee or cocoa nearby), and drive around looking at the beautiful lights and decorations that brighten up the dark Chicago winter.

Holiday traditions are made merrier this season with help from Starbucks.

All season long we find ways to be together and to enjoy our family and home.  

Holiday traditions are made merrier this season with help from Starbucks.

And on Christmas morning, my husband and I now do many of the same things that my mom and dad did back when I was so young.  (Although now we’re streaming our Christmas carols wirelessly – something they never would have imagined possible!)  

Once the coffee maker signals it’s finished making the energy we’ll need to keep up with our kids that day, we fill our Christmas mugs and bring them down for the fun to begin.

I imagine that once my children are grown and raising families of their own, they will cherish the Christmas traditions of our family the way I cherish those that my mom and dad established when I was a child.

One way that I like to share the family traditions that are so important to me is by giving coffee-related presents to special people in my family’s life.  People like teachers, crossing guards, hairstylists, postal workers, dog walkers, etc.  

I love making up lots of no-sew coffee sleeves and incorporating them into wonderfully adorable (and delicious) gifts that are always appreciated.

No-sew coffee sleeves are a wonderful gift for anyone on your list! This easy tutorial will help you make them in no time.

No-Sew Coffee Sleeve Supplies

This post contains affiliate links. Please read my disclosure policy for more information.

To make these no-sew coffee sleeves you only need a few basic supplies – all of which are available at any craft store.

  • Coffee sleeve template (which you can download by clicking that link)
  • Stiffened felt sheets in colors of your choice
  • Craft (acrylic) felt sheets in colors of your choice
  • Optional: felt stickers or patches (these are often available in holiday themes)
  • Velcro dots
  • Optional: pinking shears
  • Fabric scissors (the sharper the better)
  • Hot glue gun and hot glue
  • Pins
  • Optional: embellishments like rhinestones, ribbon, buttons, etc.

How to Make a Felt Coffee Sleeve (Without Sewing)

First, print the coffee sleeve template.  Cut it out and pin it to a piece of stiffened felt.  

No-sew coffee sleeves are a wonderful gift for anyone on your list! This easy tutorial will help you make them in no time.


Next, using the pinking shears (if you want a zig zag edge), cut the felt around the coffee sleeve template.

No-sew coffee sleeves are a wonderful gift for anyone on your list! This easy tutorial will help you make them in no time.

Now for the fun part – plan out your coffee sleeve embellishments!

Since mine are holiday gifts, I made them holiday themed with candy canes, presents, Christmas trees, and more! I used a mix of premade felt stickers and hand-cut felt for my designs.  

No-sew coffee sleeves are a wonderful gift for anyone on your list! This easy tutorial will help you make them in no time.

Here’s a tip: the sharper your scissors, the better. Dull scissors do not cut felt well at all!

No-sew coffee sleeves are a wonderful gift for anyone on your list! This easy tutorial will help you make them in no time.

Hot glue the designs and any embellishments to the middle front of the coffee sleeve.

No-sew coffee sleeves are a wonderful gift for anyone on your list! This easy tutorial will help you make them in no time.

Next, hot glue one Velcro dot to the right front edge of the coffee sleeve.
Attach the other Velcro dot to the one that is already glued down.

Put some hot glue on the smooth side of that Velcro dot, and fold the coffee sleeve around to attach it to the inner left edge of the coffee sleeve.

No-sew coffee sleeves are a wonderful gift for anyone on your list! This easy tutorial will help you make them in no time.

And then you’re finished!  

No-sew coffee sleeves are a wonderful gift for anyone on your list! This easy tutorial will help you make them in no time.

These coffee sleeves make a perfect gift with a reusable to-go mug and some delicious Starbucks beverages, like their coffees or cocoas. 

You may even want to keep one for yourself (hey – you wouldn’t want to spill while opening presents, right?)

No-sew coffee sleeves are a wonderful gift for anyone on your list! This easy tutorial will help you make them in no time.

I love that I am able to share some of my family’s holiday traditions with a simple gift.  How will you do the same with Starbucks this season?  

Filed Under: Christmas, Holiday

DIY Christmas Wall Art: Reindeer Specimen Art

December 6, 2015 by Bre 36 Comments

DIY Christmas wall art of reindeer silhouettes is an easy Christmas craft.

If you are sick of Christmas posts around here, I am sorry.  I cannot help myself.  This time of year is just SO fun and I have too many projects to share – like this DIY Christmas Wall Art that graces my Christmas mantel this year.  

Average But Inspired's holiday mantel is filled with thrift store finds and DIY art. Get the tutorial for the fun reindeer specimen art right here!

You’ll love how easy this is to make. Let me show you.

DIY Christmas Wall Art Supplies

These are the supplies I used to make this reindeer art as shown in this post. Feel free to substitute anything to make the project your own! Also, this post contains affiliate links and you can read more about those in my disclosure policy.

  • Stretched linen canvas
  • Christmas-themed scrapbook paper
  • Electronic cutting machine (like a Cricut Joy), or make a reindeer stencil by tracing a reindeer shape onto cardstock
  • Mod Podge
  • Foam brush
  • Paint marker or permanent marker
  • Small red pom pom

How to Make DIY Christmas Reindeer Art

First, I used my cutting machine to cut nine reindeer head silhouettes on different pieces of Christmas pattern scrapbook paper.  

Average But Inspired's holiday mantel is filled with thrift store finds and DIY art. Get the tutorial for the fun reindeer specimen art right here!

If you don’t have a Cricut or cutting machine, Google “reindeer silhouette,” print an image you like, and trace it onto your cardstock to cut.

Next, I put a thin layer of Mod Podge onto the backs of each of the reindeer.

Average But Inspired's holiday mantel is filled with thrift store finds and DIY art. Get the tutorial for the fun reindeer specimen art right here!

I pressed them onto the canvas and tried to keep them equidistant from one another. It wasn’t perfect but it was close enough!

Average But Inspired's holiday mantel is filled with thrift store finds and DIY art. Get the tutorial for the fun reindeer specimen art right here!

Once they were all in place and had dried, I added a thin layer of Mod Podge to the top of each reindeer to seal them into place.

Average But Inspired's holiday mantel is filled with thrift store finds and DIY art. Get the tutorial for the fun reindeer specimen art right here!

After that, I glued a red pom pom onto the last reindeer’s face, because obviously Rudolph needs a red nose!  

Then I used a green Sharpie to write each of the reindeers’ names, just in case anyone was confused about who was who.  (And yes, I had to Google the song lyrics so I would be sure to spell their names correctly.  Who knew it was “Donner” and not “Donder?”)

Average But Inspired's holiday mantel is filled with thrift store finds and DIY art. Get the tutorial for the fun reindeer specimen art right here!

And I love my reindeer art!  It looks great next to my DIY Reversible Wood Sign, too!

Average But Inspired's holiday mantel is filled with thrift store finds and DIY art. Get the tutorial for the fun reindeer specimen art right here!

This DIY Christmas wall art adds such a fun look to my mantel that’s filled with other DIY art and thrift shop finds.

Average But Inspired's holiday mantel is filled with thrift store finds and DIY art. Get the tutorial for the fun reindeer specimen art right here!

I’m happy every time I look at it.  (My husband – not so much.  He says it’s too cluttered.  But what does he know?)

Average But Inspired's holiday mantel is filled with thrift store finds and DIY art. Get the tutorial for the fun reindeer specimen art right here!

Filed Under: Christmas, Holiday

  • « Go to Previous Page
  • Page 1
  • Interim pages omitted …
  • Page 10
  • Page 11
  • Page 12
  • Page 13
  • Page 14
  • Interim pages omitted …
  • Page 17
  • Go to Next Page »

Primary Sidebar

Let’s Connect!

Hi, I’m Bre! Thanks for visiting Average But Inspired, where I show you how to work with what you’ve got to create a home you love.

Bre of Average But Inspired - a DIY and craft blog

Love DIY? Subscribe to Get Posts E-mailed!

How Can I Help You?

blank

My DIY Kitchen Makeover Reveal!

blank

How to Paint Over Tile

blank

How to Create a Faux Antique Brass Finish with Paint

blank

Limewash Stone Fireplace Makeover: Bye Bye Orange Stone Fireplace, Hello Neutral Stone Beauty!

Looking for Something?

Copyright © 2013-2022, Bre Eggert (Average But Inspired). All rights reserved.
  • Home
  • DIY
  • Crafts
  • Home Decor
  • Privacy Policy and Copyright Policy
  • Disclosures
  • Contact Me