• Skip to primary navigation
  • Skip to main content
  • Skip to primary sidebar
Average But Inspired logo - DIY and craft

Average But Inspired

Craft a home you love. DIY and craft tutorials.

  • About
    • Contact Me
    • Disclosures
    • Privacy Policy and Copyright Policy
  • DIY
    • Furniture
  • Crafts
    • Dollar Store Crafts
    • Seasonal
      • Patriotic & Summer
      • Valentine’s Day
      • Easter & Spring
      • Fall & Halloween
      • Christmas & Winter
  • Home Decor
    • Organization
  • Shop
    • DIY Swag
    • DIY Guides
  • Home

Holiday

15 DIY Holiday Gift Ideas for Under $10!

November 16, 2016 by Bre Leave a Comment

Looking for DIY holiday gift ideas or DIY Christmas gifts? Here are homemade gifts you can make for under $10!

Even though it might be too early to start decorating for Christmas (according to some, at least), it’s not too early to start thinking about holiday gift giving!  Especially when you’re planning to include some DIY Christmas gifts or diy gifts in Santa’s sleigh!

There’s always a bit more lead time involved with handmade gifts, but with a little preparation you can make some awesome presents and save a lot of cash – even during the busy holiday season!  

You don't have to spend a fortune to give someone a thoughtful gift! This post has 15 DIY Christmas Gift Ideas that you can make for under $10!

And to help get your DIY gift giving wheels turning, I rounded up some of my favorite DIY Holiday Gift Ideas that I’ve shared over the years, and all of these homemade gifts can be made for $10 or less!  

You can click through to any of the posts for complete project tutorials and supply lists!

Wearable Handmade Christmas Gifts

If you’re looking for a homemade Christmas gift idea that the recipient can wear, look no further! Here are some easy-to-make wearable Christmas gifts anyone would love.

Fabric Tape Bangle Bracelets

Make a cute set of bangle bracelets for any fashion obsessed lady on your list. Craft paint and fabric tape are all you need for this lovely homemade gift.

Paint and fabric tape are all you need to make adorable fabric tape bangle bracelets!

Upcycled Shirt Tote Bag

No sewing skills or sewing machine needed to make a cute fabric tote bag that works for trips to the library, to carry groceries, and more!  Customize with any shape or design to create a personalized gift any lady would be happy to have.

No sewing skills needed to make a cute fabric tote bag! This is a great gift idea.

Painted Leather Bracelets

Personalize plain leather bracelets with words or patterns and create a pretty and unique gift! You can purchase unfinished leather bracelets at any craft store. Multi-surface paint lets you dress them up however you like!

Use Americana Multi-Surface Paint to customize leather cuff bracelets any way you want!

Air Dry Clay Keychains

Air dry clay is so much fun and can be used to make these adorable keychains! Stamping and embossing tools give air dry clay a decorative touch.

Air dry clay keychains are a fun and simple craft that anyone can make! Plus, they make a great DIY gift!

Handmade Holiday Gifts for the Home

If you’re giving a gift to a homebody or decor-lover, handmade home decor is always a great idea!

DIY Photo Cube

A dollar store wood block becomes the perfect photo cube in minutes! Add a cute photo of you and the recipient, and you have a lovely (and inexpensive) DIY Christmas gift!

A DIY photo cube is a wonderful handmade Christmas gift idea.

Charming and Rustic “Hello” Sign

A sweet little sign is a perfect gift for a homebody or new homeowner.  Learn how to make a sign like this right in this post!

Learn how to make a cute "hello" sign to greet guests! This is a great DIY gift idea or housewarming gift.

10 Minute DIY Slate Coasters

Wrap these DIY Slate Coasters with pretty ribbon and you have a fantastic holiday hostess gift!

These DIY slate coasters are a wonderful DIY gift idea! Get the full tutorial on how to make your own coasters in this post.

Marbled Nail Polish Ornaments

Ornaments are always a great standalone gift, or a pretty wrapping paper accent.  Use dollar store nail polish and plain ceramic ornaments to make these!

Nail polish from the dollar store and plain ceramic ornaments become beautiful marbled ornaments! Give them as a pretty DIY Holiday Gift this year!

Wood Plaque Picture Frames

Pretty paint, scrapbook paper, and wood plaques are turned into adorable picture frames in this project! Customize with paper and paint that the recipient will love!

Love this quick and easy project! Turn wooden plaques from the craft store into adorable picture frames with scrapbook paper and paint. Get the full tutorial at averageinspired.com.

Newspaper Flower Pots

Decoupage a flower pot with newspaper, pop in a succulent, and you have an adorable little gift! Or, for a Christmas twist, plant a mini Christmas tree!

These little newspaper pots are so charming! They make a cute gift, too!

Etched Glass Votive Holders

Etched glass gifts are SO easy to make!  Follow this tutorial to learn how to etch just about any glass surface!

DIY etched glass votives are such a GREAT gift! They're easy to make and inexpensive. Get the full tutorial here.

Peg Doll Family Art

Paint wooden peg dolls to resemble the recipient’s family, and you’ll have an adorable and meaningful gift!

Personalize plain peg dolls to resemble your family in this fun craft!

Boutique-Style Picture Frame

Frames are always a good gift – especially when they’re pretty!  Upcycle thrift store frames with this fun gift idea!

Update a thrift shop picture frame with paint and plywood! Learn how to make a boutique-style picture frame with this simple tutorial.

Functional DIY Christmas Gift Ideas

Not a fashionista or decor lover? That’s ok! Here are some practical handmade gift ideas!

DIY Christmas Stovetop Potpourri Kit

Make a holiday simmer pot kit with dried or fresh ingredients! These lovely kits help a neighbor or friend make their home smell lovely during the holidays.

Make a DIY Christmas simmer pot gift jar for neighbors or friends!

Personalized Hostess Gift Basket

If you have a Cricut or Silhouette cutting machine, personalize some dollar store items and put together an adorable gift basket! This is a great hostess gift at Christmastime (or anytime)!

A DIY Christmas hostess gift can be made with dollar store items and a Cricut machine. Adding personalization brings this DIY gift basket together.

No-Sew Coffee Sleeves

You don’t have to use any sewing skills to make these cute coffee sleeves! Craft felt and glue are the primary supplies!

No-Sew Coffee Sleeves are a fun and easy DIY holiday gift!

So, which of these DIY Christmas gift ideas will you be making this year? Let me know in the comments below. Happy holiday gift crafting!

This post has so many DIY Christmas Gifts for under $10! Handmade holiday gifts can be so special to give and receive, so get these great DIY gift ideas in this post.

Filed Under: Christmas, Holiday

How to Make a Faux Pallet Wood Advent Calendar

November 9, 2016 by Bre 10 Comments

blank

Whew – it’s the second Wednesday of the month AGAIN!  That’s means it’s time for the Monthly DIY Challenge, when some of my favorite blogger friends and I team up to create projects that are based around common items or themes.  In the past we’ve done things like Sharpies and ModPodge, and this month we’re all creating items out of reclaimed wood (and I cannot wait to show you my faux pallet wood advent calendar!).  You’ll find links to all of the projects at the bottom of this post, but first, here’s a little teaser.  See ten amazing projects you can make with reclaimed wood! As part of the Monthly DIY Challenge you'll find these great wood project tutorials.

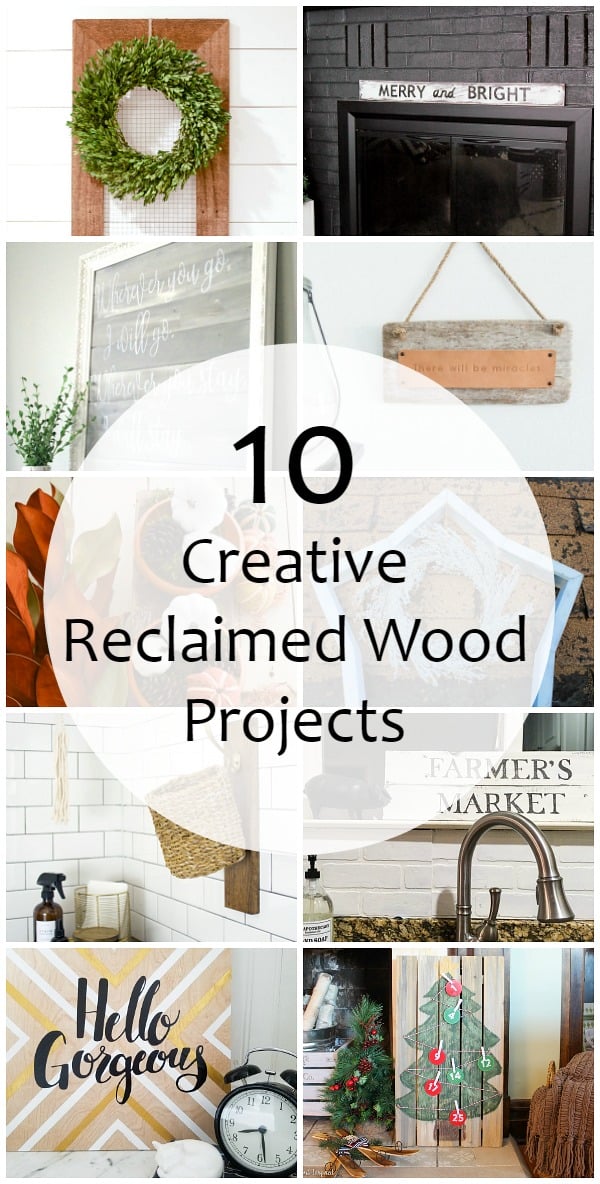
So guys, I’m not gonna lie to you.  I had a little problem with this challenge.  You see, we had to use reclaimed wood and I just do not have any reclaimed wood lying around, nor do I have easy access to any.  I live two blocks from Chicago, people!  We have a significant shortage of barns and rustic things in general.  Anyway, I had planned to hit up a salvage shop to buy some for this project, but the proverbial sh** hit the fan in my life, and that did not happen.

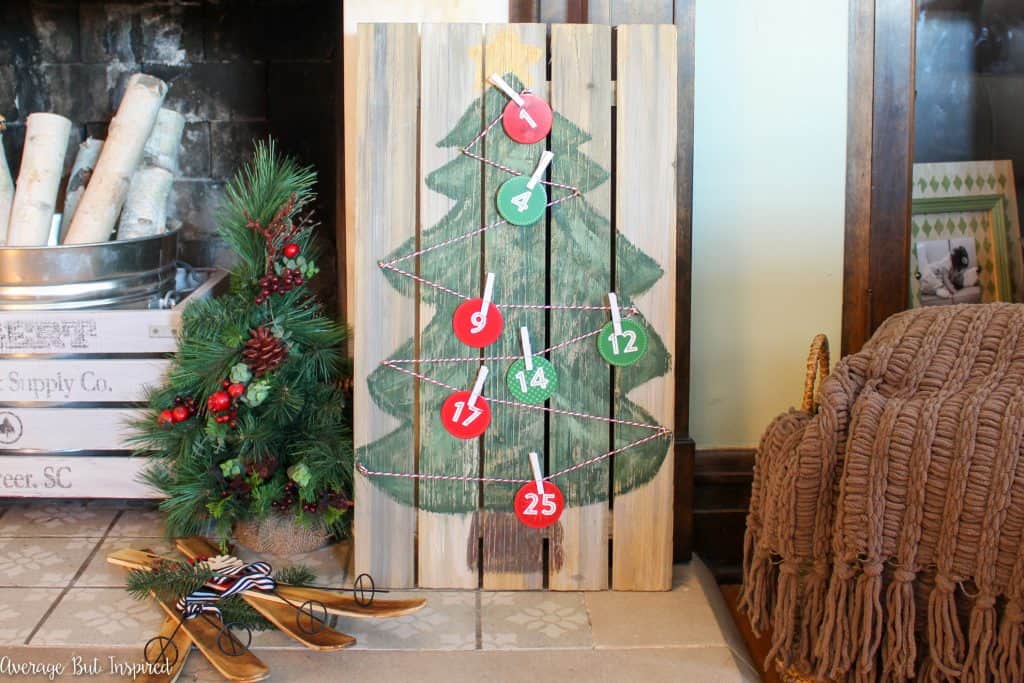
Not being one to give up on a challenge, however, I decided to try and make NEW wood look like reclaimed wood, so that’s what I’m using – fake reclaimed wood that I’ve turned into a Faux Pallet Wood Advent Calendar!
Learn how to make an adorable and rustic DIY Advent Calendar or Christmas Countdown Calendar. This tutorial teaches you how to make this simple advent calendar for your holiday celebration.

If you have reclaimed wood lying around, you can definitely use that for this project!  Or, you can use my method of turning new wood into wood that looks old, and make this rustic advent calendar.

Supplies Needed to Make a Faux Pallet Wood Advent Calendar

Some of these links are affiliate links, which means that I earn a small commission at no added cost to you, if you purchase through them.  To read my full disclosure policy, please click here.

  • Craft pallet wood sign
  • Amy Howard Vintage Wood “Better With Age” Salvaged Timber
  • Sandpaper
  • Chip brushes
  • Acrylic paints in gray, white, dark green, light green, brown, yellow, and gold
  • Christmas Countdown set (I got mine at Michaels but couldn’t find this set online)
  • Small eye hooks

How to Make a Faux Pallet Wood Advent Calendar

To make this project fit with the theme of this month’s Monthly DIY Challenge, I had to make my NEW wood look OLD!  Thankfully, the generous folks at Amy Howard at Home had given me a container of Vintage Wood “Better With Age” in my swag bag from the Haven Conference, so I decided to get it out and give it a try.  Learn how to make new wood look old! This tutorial shows you how to age new wood almost instantaneously to get a reclaimed wood look in no time!

I followed the instructions and brushed it on, leaving enough time to dry.    Learn how to make new wood look old! This tutorial shows you how to age new wood almost instantaneously to get a reclaimed wood look in no time!

By the time I’d returned from my son’s gymnastics class, my new wood pallet definitely looked aged and old!  There were gorgeously weathered gray highlights all over!Learn how to make new wood look old! This tutorial shows you how to age new wood almost instantaneously to get a reclaimed wood look in no time!

I took my pallet downstairs and beat it up a little bit with a hammer.  Then I mixed up some gray and white acrylic paint with some water, and brushed it on to give the wood an even more weathered look.  Learn how to make new wood look old! This tutorial shows you how to age new wood almost instantaneously to get a reclaimed wood look in no time!

Once all was said and done, my faux pallet wood looked like this.  Learn how to make new wood look old! This tutorial shows you how to age new wood almost instantaneously to get a reclaimed wood look in no time!

So as you can see, I did my best to get the reclaimed wood look when all I had to work with was new wood!  Next up, I painted a Christmas tree onto the wood with a mixture of green acrylic paint.  I added a little stump and a star on top for good measure.  Learn how to make an adorable and rustic DIY Advent Calendar or Christmas Countdown Calendar. This tutorial teaches you how to make this simple advent calendar for your holiday celebration.

After the paint dried, I sanded it down a bit to give it a more rustic look.  Next, I screwed some eye hooks onto the edges of the tree.  Learn how to make an adorable and rustic DIY Advent Calendar or Christmas Countdown Calendar. This tutorial teaches you how to make this simple advent calendar for your holiday celebration.

Then I opened up my Christmas Countdown set and tied the red and white twine through the hooks to make it look like the tree had garland.  Learn how to make an adorable and rustic DIY Advent Calendar or Christmas Countdown Calendar. This tutorial teaches you how to make this simple advent calendar for your holiday celebration.

Learn how to make an adorable and rustic DIY Advent Calendar or Christmas Countdown Calendar. This tutorial teaches you how to make this simple advent calendar for your holiday celebration.

And then my Faux Pallet Wood Advent Calendar was ready to be displayed.  Learn how to make an adorable and rustic DIY Advent Calendar or Christmas Countdown Calendar. This tutorial teaches you how to make this simple advent calendar for your holiday celebration.

Now don’t worry.  I know it’s early November.  I put my advent calendar away after I took these photos.  Learn how to make an adorable and rustic DIY Advent Calendar or Christmas Countdown Calendar. This tutorial teaches you how to make this simple advent calendar for your holiday celebration.

And my mother-in-law already said she wants it, so I won’t even be putting it back out again in my own home.  Learn how to make an adorable and rustic DIY Advent Calendar or Christmas Countdown Calendar. This tutorial teaches you how to make this simple advent calendar for your holiday celebration.

But that’s OK.  My husband says we have enough “Christmas Clutter” as it is.  (And I hate to admit it, but he’s probably right.)  Learn how to make an adorable and rustic DIY Advent Calendar or Christmas Countdown Calendar. This tutorial teaches you how to make this simple advent calendar for your holiday celebration.

But making this project did make me excited for the upcoming season, so I will be looking forward to decorating soon and counting down the days until Santa arrives!

If you liked this post, I’d love for you to “pin” it so share the love!  Learn how to make an adorable and rustic DIY Advent Calendar or Christmas Countdown Calendar. This tutorial teaches you how to make this simple advent calendar for your holiday celebration.

Learn how to make new wood look old! This tutorial shows you how to age new wood almost instantaneously to get a reclaimed wood look in no time!

And don’t forget to visit my friends to see what amazing things they created with ACTUAL reclaimed wood!  I know they’d love to have you check out their projects!

Filed Under: Christmas, Holiday

Bundt Pan Pumpkins Upcycle

September 27, 2016 by Bre 17 Comments

blank

Transform bundt pans into adorable pumpkins for fall or Halloween!

Sometimes I buy things at Goodwill for no reason at all.  These mini bundt cake pans that I got for .50 a piece are an example.  

I have no idea why I brought them home with me.  I don’t really bake (unless you consider making Tollhouse cookies from the pre-made dough tube to be baking. LOL.)  

These mini bundt cake pans were turned into adorable pumpkins for fall decor!

So these little bundt pans sat in my basement until I got the idea to transform them into pumpkins for some fall decor in my kitchen!  

Adorable! Turn mini bundt cake pans into whimsical pumpkin decor for your home or kitchen this fall! Mini bundt cake pans are all over thrift stores. Get some and make this cute fall decor DIY!

Do they look like pumpkins to you?  I think they do, but my son says no.  I think he’s thinking too literally.  Four year olds.  

Supplies Needed to Make Bundt Pan Pumpkins

Here’s what I used to upcycle these bundt pans into decorative pumpkins! Feel free to supplement with things you already have on hand. Also, some of these are affiliate links, and you can learn more about that in my disclosure policy.

  • Mini bundt cake pans (look for them at the thrift store! But if you really need them, you can buy them at that link)
  • Orange multi-surface craft paint
  • Ivory multi-surface craft paint
  • Chip brush
  • Decorative scrapbook paper (in colors of your choice to serve as pumpkin backdrop)
  • Decorative scrapbook paper in green shades (to serve as the leaves of your pumpkin)
  • Double sided tape
  • Thin cork
  • Raffia
  • High heat hot glue and glue gun
  • Picture frames

How to Make Bundt Cake Pan Pumpkins

First you have to transform those mini bundt cake pans with some paint!  

Get out your brush and mix up some orange shades for your pumpkins.  Paint and let them dry.  

Turn mini bundt cake pans into pumpkins for your fall decor! These are a perfect fall decoration for the kitchen or anywhere else in the home!

Cut decorative scrapbook paper to the size of the opening of your picture frames.  Tape the scrapbook paper onto the frame backing and put the frames back together (minus the glass).  

Turn mini bundt cake pans into pumpkins for your fall decor! These are a perfect fall decoration for the kitchen or anywhere else in the home!

Hot glue the bundt cake pans onto the scrapbook paper in the frames.

Turn mini bundt cake pans into pumpkins for your fall decor! These are a perfect fall decoration for the kitchen or anywhere else in the home!

Cut a strip of the thin cork and glue it into a spiral.  Glue it to the scrapbook paper at the top of the bundt cake pan.  

Turn mini bundt cake pans into pumpkins for your fall decor! These are a perfect fall decoration for the kitchen or anywhere else in the home!

Tie some raffia in a knot and hot glue that to the scrapbook paper and cork pumpkin stem.  

Turn mini bundt cake pans into pumpkins for your fall decor! These are a perfect fall decoration for the kitchen or anywhere else in the home!

Cut some leaves out of green scrapbook paper and hot glue those to the raffia, cork stem, and/or bundt cake pan.  

Turn mini bundt cake pans into pumpkins for your fall decor! These are a perfect fall decoration for the kitchen or anywhere else in the home!

And then your bundt pan pumpkins are finished!  

Turn mini bundt cake pans into pumpkins for your fall decor! These are a perfect fall decoration for the kitchen or anywhere else in the home!

So cute, right?!?  

Turn mini bundt cake pans into pumpkins for your fall decor! These are a perfect fall decoration for the kitchen or anywhere else in the home!

Love Pumpkin Crafts? You’ll Like These Posts, Too!

20 Unique Pumpkin Crafts

Turn mini bundt cake pans into pumpkins for your fall decor! These are a perfect fall decoration for the kitchen or anywhere else in the home!

I think this was a perfect use for some of my mini bundt cake pans!  And I think my son is wrong.  These TOTALLY look like pumpkins.  DUH, little man.

Turn mini bundt cake pans into pumpkins for your fall decor! These are a perfect fall decoration for the kitchen or anywhere else in the home!

I popped these babies in my kitchen for a little touch of fall – kitchen style!  

Turn mini bundt cake pans into pumpkins for your fall decor! These are a perfect fall decoration for the kitchen or anywhere else in the home!

I have a few more of these little bundt cake pans left over, so if you have other ideas of what I could make them into, let me know!  

Turn mini bundt cake pans into pumpkins for your fall decor! These are a perfect fall decoration for the kitchen or anywhere else in the home!

And I’d love for you to ‘pin’ this post if you enjoyed it!  

-Bre

Filed Under: Fall and Halloween, Holiday

Paper Craft Projects for Fall

August 30, 2016 by Bre 6 Comments

blank

These paper craft projects for fall will have you ready for cooler weather to roll in! They’re quick projects that are easy to make!

Because the kids are back in school and the calendar is about to turn to September, I’ve made a mental switch to all things fall.  I’m sorry if you’re not ready for the change of season quite yet.  But I am.  

I’m excited for my favorite time of year to roll in – especially so my hair no longer looks like Hagrid’s from Harry Potter.

Because of that, I thought I’d share some early fall inspiration ideas today.  So I scoured Blogland and Pinterest to find the best Paper Craft Projects for Fall to share with you!  

These paper craft projects for fall are sure to inspire you to get out your scrapbook paper stash, scissors and glue! Check out the great ideas right here.

Paper crafts are among my favorites because they’re so inexpensive to make, and you rarely need more than a few simple supplies!  

Check out these fabulous fall ideas, and click through to visit any of the sources for the full tutorial.  Also, if you love any of these ideas, please pin from the original blog post that you click through to visit, or just pin the collage at the top of the page!  

Alright, are you ready to see all of the awesome fall paper craft project ideas?  (Nod your head yes.)

Paper Covered Pumpkins – First Day of Home 

Paper covered pumpkins from First Day of Home blog

DIY Scrapbook Paper Fall Sign – Crafts by Courtney for Mod Podge Rocks  

DIY Scrapbook Paper Fall Sign from Crafts by Courtney for Mod Podge Rocks

Watercolor Paper Leaf & Branch Mobile – Happiness is Homemade  

Watercolor Fall Leaf and Branch Mobile from Happiness is Homemade

Glitter Glaze “Paper Words” Jars – Average But Inspired  

Glitter glaze glass jars with easily removable paper letters.

3D Paper Pumpkin – Crafts by Amanda  

This 3D paper pumpkin is from Crafts by Amanda

Scrapbook Paper Fall Banner – AKA Design  

This Scrapbook Paper Banner is from AKA Design

Scrapbook Paper Fall Wreath – A Cultivated Nest

This Scrapbook Paper Wreath is from A Cultivated Nest

Paper Leaf Wreath – Polka Dot Chair  

This Paper Leaf Wreath is from Polka Dot Chair

Paper Strip Pumpkins – Meaningful Mama  

These Paper Strip Pumpkins are from Meaningful Mama

Fall Banner with Book Page Leaves – Sondra Lyn at Home  

Fall Mantel with Fall Leaf Banner via Sondra Lyn At Home.com

3D Paper Pumpkins – DIY Inspired  

Learn how to make 3d pumpkins with this project from DIY Inspired

Thankful Banner – Dwell Beautiful  

This "thankful" banner from Dwell Beautiful can be made by anyone!

OK so which of these fall paper craft projects are you going to make first?  I think I need a paper wreath in my life!

Bre

Filed Under: Fall and Halloween, Holiday

USA Wooden Flag Map Door Hanger

June 28, 2016 by Bre 4 Comments

blank

I’m not a big decorator for the Fourth of July (or Memorial Day or Labor Day), but I do like to have a little bit of Americana on display to help celebrate the USA’s birthday.  I sort of feel like it’s my duty as an American and a blogger.  When I found this plain wooden USA shape at Michaels for 70% off (it was $2.99, people!), I just knew I had to turn it into my newest piece of decor for all of the patriotic holidays we have in the U.S.  Show your patriotism with this cute USA Wooden Flag Map Door Hanger project! It's an easy DIY that's perfect for the Fourth of July.

With some paint, buttons, and fabric, I spiffed it up and turned it into this adorably rustic USA wooden flag map door hanger!  Show your patriotism with this cute USA Wooden Flag Map Door Hanger project! It's an easy DIY that's perfect for the Fourth of July.

I love its sweet simplicity.  I think it’s a perfect addition to my Fourth of July decor.

Supplies Used For Wooden Flag Map Door Hanger

Some of these links are affiliate links.  To read my full disclosure policy, please click here.

  • Wooden USA cutout (linked product is similar to the one I used.  I could not find the product I purchased at Michaels online.)
  • Red and Blue craft paint or chalky finish paint (if the wooden cutout you use is not pre-painted white, then you’ll also want to purchase white paint)
  • Paintbrush
  • Small flat-back buttons (These would be perfect!  I wish I had them in my craft stash for this project!)
  • Wood glue
  • Navy fabric scrap
  • Scissors or pinking shears
  • Ruler
  • Pencil
  • Optional: twine or ribbon to hang (if your wooden USA cutout doesn’t come prehung like mine)

How to Make a Wooden Flag Map Door Hanger

If your wooden USA cutout isn’t prefinished white like mine, paint it white.

Next, mark off a partial square in the top left corner and paint it blue.  Show your patriotism with this cute USA Wooden Flag Map Door Hanger project! It's an easy DIY that's perfect for the Fourth of July.

Using a ruler or straight edge, draw horizontal stripes across the rest of the map.  Paint alternating stripes with red paint.  Show your patriotism with this cute USA Wooden Flag Map Door Hanger project! It's an easy DIY that's perfect for the Fourth of July.

Glue buttons into the blue square with the wood glue.  I only had nine buttons so I went with it.  You could use as many or as few as you want.  Show your patriotism with this cute USA Wooden Flag Map Door Hanger project! It's an easy DIY that's perfect for the Fourth of July.

Cut a fabric scrap and tie it to the hanging part of the wooden map.  (If your map didn’t come prehung, staple twine or ribbon to the back to create a hanger.)  Show your patriotism with this cute USA Wooden Flag Map Door Hanger project! It's an easy DIY that's perfect for the Fourth of July.

Hang and enjoy!  Show your patriotism with this cute USA Wooden Flag Map Door Hanger project! It's an easy DIY that's perfect for the Fourth of July.

I have “Proud to Be an American” running through my head as I type this post. . . Show your patriotism with this cute USA Wooden Flag Map Door Hanger project! It's an easy DIY that's perfect for the Fourth of July.

Show your patriotism with this cute USA Wooden Flag Map Door Hanger project! It's an easy DIY that's perfect for the Fourth of July.

I seriously cannot get the song out of my head.  It’s like the dramatic bass is happening and everything.Show your patriotism with this cute USA Wooden Flag Map Door Hanger project! It's an easy DIY that's perfect for the Fourth of July.

Despite this project causing patriotic songs to invade my brain, I’m so glad I upgraded my little clearance find into this pretty door decor.  Show your patriotism with this cute USA Wooden Flag Map Door Hanger project! It's an easy DIY that's perfect for the Fourth of July.

Do you decorate for the Fourth of July or other patriotic holidays?


Filed Under: Holiday, Patriotic

Number One Dad Memory Box {Easy DIY Father’s Day Gift}

May 31, 2016 by Bre 4 Comments

blank

Father’s Day will be here before you know it!  While the dads in your life probably have some gifts in mind that aren’t homemade, the fact of the matter is that every dad (especially of young kids), has a treasure trove of handmade cards, love notes, and special pictures made for them by the ones they love the most.  

A Memory Box is a great DIY Father's Day Gift! It's a wonderful place for dads to store the treasures their kids make for, and give to, them. Plus it's simple to make and inexpensive!

That’s why this easy DIY Father’s Day gift idea of a manly memory box is a great gift for any dad!  It gives them a place to keep their treasures safe and accessible for those days when they need to look back and remember just how much they’re loved!  

Supplies Needed to Make a Father’s Day Memory Box

Some of these links are affiliate links.  To read my full disclosure policy, please click here.

  • Unfinished wood photo box
  • Wood stain in the color of your choice
  • Rag to apply stain
  • Martha Stewart Letter Stencils
  • Black acrylic paint
  • Small pouncer brush
  • Painter’s tape
  • Scrapbook paper
  • Spray adhesive

How to Make a DIY Father’s Day Gift Memory Box

Begin by staining the unfinished wood photo box.  I did not stain the inside of the box, but you could do that, of course!

A Memory Box is a great DIY Father's Day Gift! It's a wonderful place for dads to store the treasures their kids make for, and give to, them. Plus it's simple to make and inexpensive!

After the stain has dried, stencil the words “No. 1 Dad” onto the exterior of the photo box.  I used painter’s tape to hold my stencils in place.

If you have a Cricut machine you could also cut letters on vinyl and place them on the box.  I recently got the Cricut Joy machine (it’s the tiniest Cricut), and I absolutely love it! Check out my post on DIY Dollar Tree Gifts with the Cricut Joy to learn more!

A Memory Box is a great DIY Father's Day Gift! It's a wonderful place for dads to store the treasures their kids make for, and give to, them. Plus it's simple to make and inexpensive!

I worked from the outside of the box inward so that I would be sure to have my spacing exactly right!  

DIY Father's Day Gift Memory Box-9309A Memory Box is a great DIY Father's Day Gift! It's a wonderful place for dads to store the treasures their kids make for, and give to, them. Plus it's simple to make and inexpensive!

After the paint dried, I printed the word “memories” onto a piece of computer paper and cut it to fit in the label holder on the front of the box.  

Then I cut some manly-looking scrapbook paper to fit the inside of the box and affixed it to the inside with spray adhesive.  

A Memory Box is a great DIY Father's Day Gift! It's a wonderful place for dads to store the treasures their kids make for, and give to, them. Plus it's simple to make and inexpensive!

How easy and practical is this DIY Father’s Day gift?  I’m telling you – it’s the perfect place for dads to store all of their treasures.  

A Memory Box is a great DIY Father's Day Gift! It's a wonderful place for dads to store the treasures their kids make for, and give to, them. Plus it's simple to make and inexpensive!

I know my husband will like having a designated place for all of the special things my kids have made him and given him over the years.  Right now they just sit on the shelf in his closet.  

A Memory Box is a great DIY Father's Day Gift! It's a wonderful place for dads to store the treasures their kids make for, and give to, them. Plus it's simple to make and inexpensive!

This memory box really is a great DIY Father’s Day gift for any dad!  It’s simple, inexpensive to make, and very practical.  From what I know about men, those are all things they can appreciate.  🙂

Filed Under: Holiday

  • « Go to Previous Page
  • Page 1
  • Interim pages omitted …
  • Page 9
  • Page 10
  • Page 11
  • Page 12
  • Page 13
  • Interim pages omitted …
  • Page 17
  • Go to Next Page »

Primary Sidebar

Let’s Connect!

Hi, I’m Bre! Thanks for visiting Average But Inspired, where I show you how to work with what you’ve got to create a home you love.

Bre of Average But Inspired - a DIY and craft blog

Love DIY? Subscribe to Get Posts E-mailed!

How Can I Help You?

blank

Limewash Stone Fireplace Makeover: Bye Bye Orange Stone Fireplace, Hello Neutral Stone Beauty!

blank

How to Paint a Door to Look Like Wood (It’s Easier Than You Think!)

blank

7 Tips for Hosting a Party on a Budget

blank

My DIY Kitchen Makeover Reveal!

Looking for Something?

Copyright © 2013-2022, Bre Eggert (Average But Inspired). All rights reserved.
  • Home
  • DIY
  • Crafts
  • Home Decor
  • Privacy Policy and Copyright Policy
  • Disclosures
  • Contact Me