Transform unfinished stock cabinets into a beautiful DIY built-in dry bar.
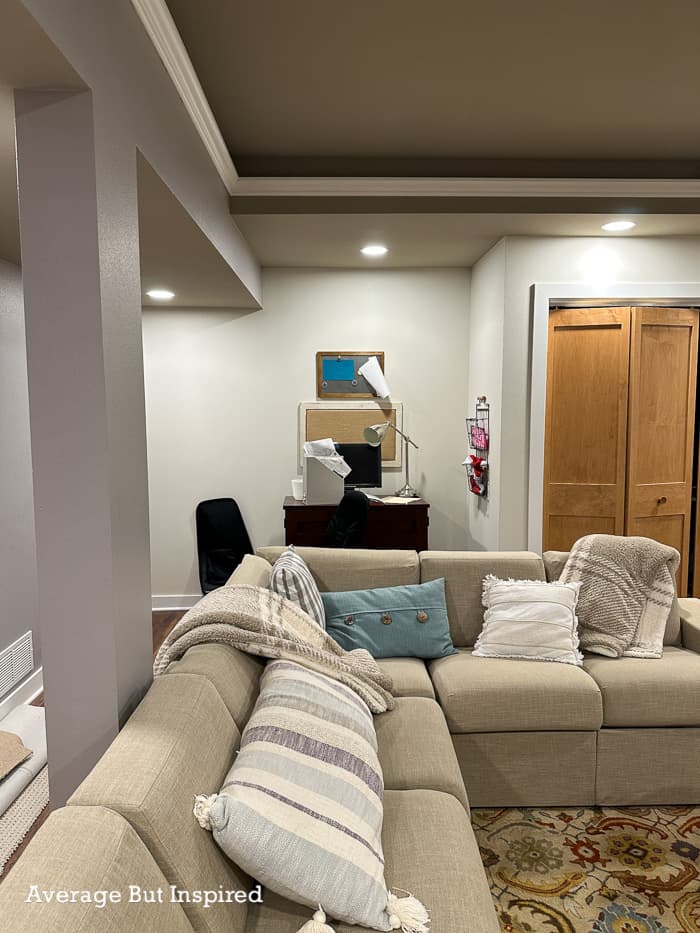
Our basement has a little nook where we placed a desk that we never used . . . except as a dumping ground. It was a literal waste of space!
This post contains affiliate links. Please read my disclosure policy for more information.
My kids convinced me that we needed a beverage refrigerator (for soda! They’re tweens and teens), and a snack bar area. A snack area would be “so perfect for when their friends are over.”
I thought this would be a great idea for when we have adult get togethers, too. If I built a dry bar, we could all enjoy it!
So, out went the desk (thank you, Facebook Marketplace for a quick sale), and I got to work on a built-in basement dry bar that I am so proud of!
DIY Dry Bar Part 1: The Cabinetry
The first part of the project revolved around the cabinetry.
Measuring for the Dry Bar
I measured the nook (57″ wide) and then figured out which beverage fridge I wanted. I chose this 130-can beverage cooler because of the capacity, good reviews, and because I liked the wood shelf fronts.
With those dimensions, I then determined what size base cabinets I could fit in this space. I chose an 18 inch wide base cabinet with three drawers and a 15 inch wide base cabinet with a drawer and door.

Covering the Unfinished Parts of the Cabinets
Because the left side of the cabinet would be exposed, I glued on a cabinet end panel (and cut out a toe kick notch with a jigsaw). I also glued on toe kick molding to cover the unfinished toe kicks on the cabinets.
I used construction adhesive to attach these pieces, and used a combo of clamps and tape to hold them in place while the adhesive cured.
Painting the Dry Bar Cabinetry
The next day I set up my space for painting! I hung plastic sheeting and masked off the cabinets because I was going to use my new Wagner Flexio 5000 Paint Sprayer (gifted) to paint these!
I gave the cabinets a light sanding and wiped off the dust. Even though they were new, they had some rough spots!
Then I primed with Behr Multi-Surface Stain-Blocking Primer and painted with two coats of Behr Cabinet and Trim Enamel in Calligraphy (a gorgeous dark blue with charcoal gray undertones).
Using the paint sprayer made this go SO FAST, and I love that there are no brush strokes on these cabinets. They look professional!
I let them dry and cure for a few days, and then I began the installation process.
Installing the Base Cabinets for the Basement Bar
Because our basement has luxury vinyl plank flooring (read the review of my flooring at that link), which is a floating floor, I had to remove the flooring underneath the cabinets before installation.
I’m glad I learned that you can’t install cabinets on top of a floating floor before it was too late! (Note: I also removed the baseboards and shoe trim at this time so that the cabinets could sit flush with the walls.)
It was not too difficult to remove the LVP planks. I set the cabinets where I wanted them, traced the outline in pencil, and then used a Cordless Multi-Tool to cut the planks and remove.
I left the LVP underlayment to serve as a barrier between the concrete floor and the wood cabinets. And, I added more underlayment around the edges between the wall and where the flooring had begun. I didn’t want the wood cabinets coming into contact with the concrete in case moisture would seep up into them.
Then I moved the base cabinets into place and attached them to studs in the wall with 3-inch screws (#10) – making sure they were level with each other. I had to do some shimming to make that happen.
I watched a lot of YouTube videos on installing base cabinets! I was really relieved when this part was finished, and I seemed to get it right.
Once the cabinets were installed, I cut a 1×2 piece of scrap wood and attached that to the wall between the cabinets. This would give the eventual countertop some support in that middle section.
I also cut a hole in the far left side of the left base cabinet and attached a recessed power strip to it, which I plugged into the outlet in the refrigerator space. I wanted to make sure to have power access once this dry bar was operational!
Basement Dry Bar Part 2: Open Shelving
The next part of the project was installing open shelving over the base cabinets. I did this before installing the countertop and backsplash because it was easier access to the wall without those things in place.
This was a simple project because I cut down two 1×8 boards to the length I needed, stained them a dark brown to coordinate with the flooring, and applied a wax topcoat.
I ordered shelf brackets that fit common boards, and I applied Rub n Buff to them to make them gold.
I then hung two battery operated, remote-controlled sconce lights above the shelves to help fill that space between the top shelf and the ceiling. I LOVE these lights! I’m definitely not an electrician, so these battery lights are perfect!
DIY Dry Bar Part 3: Laminate Countertop Installation
I chose to install a laminate countertop in a marble pattern for this dry bar for several reasons: 1. it was incredibly budget-friendly; 2. I was able to size it and install it myself; 3. it was available off the shelf (not special order); and 4. I liked how it didn’t come with an attached backsplash, as many laminate countertops do!
I attached it to the base cabinets with wood screws, and you can learn more about my DIY laminate countertop installation in a forthcoming post.
Built-In Dry Bar Part 4: Installing a Tile Backsplash
Although a dry bar definitely doesn’t require a tile backsplash, I have always wanted to try tiling so I went for it here! (Note: this was AFTER I hung an awful peel and stick wallpaper. You can see it in the linked Instagram Reel!)
I used the internet famous Musselbound Tile Adhesive Mat for this installation (instead of mortar or thinset), and you can read all about tiling with Musselbound in this post!
The tiling process was a breeze until I had to start cutting these porcelain tiles for the edge. Then things got hairy (again, you can read about it in this post about tiling). But thankfully, it was all fine in the end!
Dry Bar Part 5: Finishing Touches
Installing the tile was emotional and draining for me (I think I was really tired!), so I took a few days off and then got to work putting the finishing touches on the basement bar area.
I cut down and reattached the baseboards and shoe trim to the walls, and then I cut and attached shoe trim around the base of the cabinets (which I painted to match the cabinets).
I also drilled the holes for the beautiful blue drawer pulls, and reattached the door and drawers.
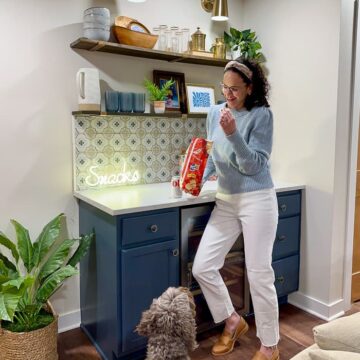
Finally, I had fun pulling out my decor stash (much of it thrifted!), and styling the snack bar shelves.
The Finished DIY Built-In Dry Bar
In the end, the basement dry bar came together and looks better than I ever imagined!
I am SO proud of myself. I set out to do this project by myself, and I accomplished that (with just the tiniest amount of help from my husband with tile cutting).
I learned SO much while building this basement bar, and can’t wait to see where the skills I acquired take me project-wise in the future!
For now, I’m just happy that my kids are really excited to use this as a snack bar. (Well, to be honest, they probably would’ve been happy with a folding table and the candy and chips I’ve got down here!)
I hope you enjoyed seeing my biggest solo DIY project yet! Please let me know what you think of it in the comments below, and drop any questions you have!
Shop My DIY Built-In Dry Bar
- 130-can beverage refrigerator
- Hampton Bay 18 inch base cabinet with drawers
- Hampton Bay 15 inch base cabinet with drawer and door
- Cabinet end panel
- Cabinet toe kick
- Behr Multi-Surface Primer
- Behr Cabinet & Trim Enamel
- Flexio 5000 Paint Sprayer
- Ryobi Cordless Multi-Tool
- Recessed power strip
- Shelf brackets
- Rub n Buff
- Battery-Operated Wall Sconce Lights
- Laminate Countertop
- Musselbound Tile Adhesive Mat
- Porcelain Tile
- Snacks Neon Light