While working on a mini-makeover of my dining room, I realized that I had to tell you about an AMAZING change in the room that I made for FREE.
Ready? I reorganized my china cabinet. I know it sounds ridiculous, but it has made an incredible difference in the look of my dining room!
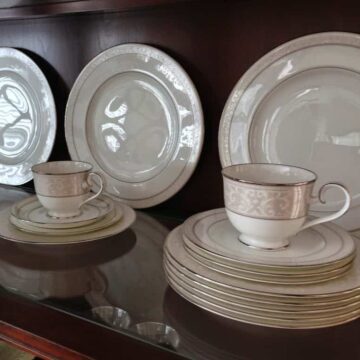
Before I show you my new and improved china cabinet, I will show you the “before.”
Prior to repainting the dining room (which required emptying the china cabinet of its contents and moving it), I snapped this photo so that I would remember where I had everything once I was able to put it all back.

When it came time to put everything away again, I looked at the photo and thought “Ew. This looks pretty terrible.” Bland and disorganized – the china cabinet sort of blended into the wall without making any sort of impact at all.
P.S. this is the china cabinet from my old house. To see my NEW built-in china cabinet and how I displayed china in that cabinet, check out my Dated Oak China Cabinet Makeover post and my Modern Vintage Dining Room Makeover. I think you’ll love it!
China Cabinet Inspiration Pictures
I decided that there must be a better way to do justice to the china and crystal that I’ve used three times since my wedding in 2006 (lol!). So I scoured Pinterest and Google to find just the inspiration that I needed.
The first image I came across was from Katie at Bower Power. Look at her lovely china hutch and the beautiful way she organized her dishes. So much nicer than mine.

The next image that caught my eye was from Jennifer at Dimples & Tangles. Of course I LOVED the green painted cabinet, but I also noticed how nicely her dishes were arranged.
Just as with Katie at Bower Power’s china hutch, many of Jennifer’s dishes were displayed vertically to make each shelf within the cabinet pop. My dishes were simply stacked one on top of the other, so I knew this was a change I needed to make.
Finally, I found an awesome post by Darla at Heartwork Organizing about how to arrange a china cabinet. She gave fantastic tips about choosing a focal point, arranging with symmetry in mind, and about products that help with the display of china.
How to Arrange a China Cabinet
Armed with these inspiration pics and advice, I reloaded my china cabinet in a way that has made an INCREDIBLE impact on the room. If I do say so myself, my china cabinet is now a beautiful focal point instead of a bland-but-overwhelming piece of furniture.
I only used things I already had to revamp my cabinet, and I am shocked at the improvement! (But here’s a tip I can share from arranging my gigantic china cabinet in my new home: fill in empty spots with thrift store china, crystal, silver, etc. You’ll spend hardly any money and get that china cabinet display just right!)
The contrast of the white dishes against the dark furniture has really helped to lighten up the room, and the symmetrical display of the items inside makes it so much nicer to look at.
Wondering how to stand plates vertically in a china cabinet? If your china cabinet or china hutch doesn’t have a built-in ledge for displaying plates, use clear acrylic plate stands (affiliate link) to stand them up vertically without covering them up.
The linked acrylic plate stands (affiliate link) are what I use in my new home’s built-in china cabinet, and they work wonderfully for displaying china plates vertically.
Stacking china pieces like plates, bowls, and/or coffee cups also creates interesting variations of height within the china cabinet.
All of these simple tweaks make it easy to arrange a china cabinet and create a gorgeous backdrop for your next dinner party.
Let me know if you have any other tips for arranging a china cabinet that you’d like to add. (And PS – now that you’ve got a plan for your china cabinet, check out my post on how to organize a pantry!)