Unfortunately for me, there aren’t many Dollar Tree stores near my new house. (I had five within a mile of my old house – see more of my love for Dollar Tree in my post sharing my favorite dollar store home decorating ideas!) I visited one nearby last week and didn’t find much except for some metal napkin holders.
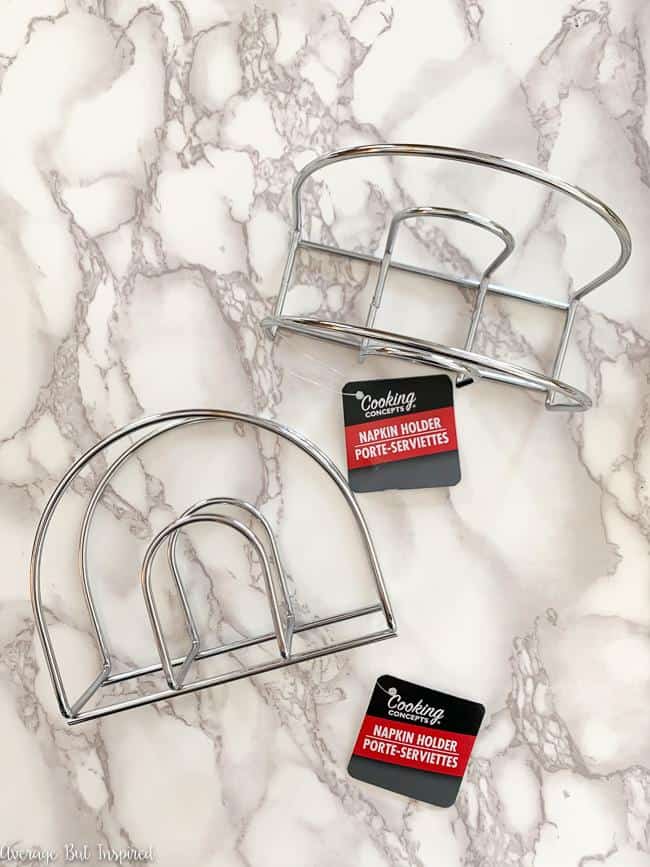
I bought three and planned to use them to hold clutch purses in my closet, but then after looking at them, I knew I had to turn one into a rainbow craft instead. I mean, just look at them! They practically scream “make me into a rainbow!” (Right? You see that, don’t you?)
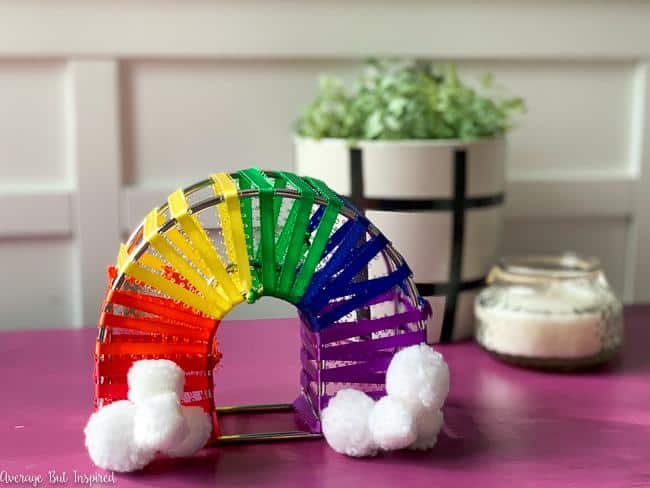
So . . . I got to work and created some adorable DIY Rainbow Room Decor with one of the napkin holders, and left one of my clutch purses alone on the shelf while the others got a new home in the remaining two napkin holders. 
Supplies Needed to Make This Rainbow Decor Craft
This post contains affiliate links. To read my full disclosure policy, please click here.
- Dollar Tree metal napkin holder
- Thin ribbon in red, orange, yellow, green, blue, and purple
- Scissors
- Hot glue gun and hot glue
- White yarn pom poms
How to Make DIY Rainbow Room Decor
You’re going to love how quickly this colorful rainbow decor craft comes together!
Begin by cutting ribbon in rainbow colors to lengths that measure approximately 16″.
Next, tie the ribbon pieces together in rainbow color order to form one long length of ribbon.
Beginning with the red end of the ribbon length, tie the end to the back of the metal napkin holder.
Plug in the hot glue gun, and while it’s heating, begin wrapping the rainbow ribbon around the napkin holder. (Yikes, can I just say that my thumb looks really gross there?)
Continue wrapping the ribbon around the napkin holder, and fasten it in place as you go with the hot glue. Once the entire napkin holder is wrapped in ribbon, cut the ends of the ribbon where the pieces were attached to create the long string.
Finally, hot glue white yarn pom poms to the bottom of the rainbow sculpture to create adorable clouds on your rainbow room decor.
If you wanted to make this rainbow room decor a cute addition to your St. Patrick’s Day decor, you could easily swap the white pom poms for gold coins or a shamrock from the craft store. How cute would that be?
This adorable piece of rainbow decor sits nicely on a shelf and adds a colorful pop to any room (kids’ bedrooms, especially), or to any St. Patrick’s Day decorations! Make sure to PIN it or share it with any crafty friends who might enjoy making one of their own!
-Bre
Into Rainbow Crafts? Check Out These Rainbow Sand Art Terrariums!