• Skip to primary navigation
  • Skip to main content
  • Skip to primary sidebar
Average But Inspired logo - DIY and craft

Average But Inspired

Craft a home you love. DIY and craft tutorials.

  • About
    • Contact Me
    • Disclosures
    • Privacy Policy and Copyright Policy
  • DIY
    • Furniture
  • Crafts
    • Dollar Store Crafts
    • Seasonal
      • Patriotic & Summer
      • Valentine’s Day
      • Easter & Spring
      • Fall & Halloween
      • Christmas & Winter
  • Home Decor
    • Organization
  • Shop
    • DIY Guides
  • Home

Dollar Tree

The Perfect Pumpkin Sign (A Fall Dollar Tree DIY!)

August 20, 2019 by Bre Leave a Comment

Dollar Tree has always been my favorite, but this season they have seriously stepped up their crafting and DIY game!  If you haven’t stocked up on fall and Halloween crafting supplies yet, you need to get over there pronto.  (And if you haven’t read my post on The Best Craft Supplies to Buy at Dollar Tree – do it!)  I picked up a few of their new fall items and make the perfect pumpkin sign for my fall decor – and it only took about 20 minutes!  Make the perfect pumpkin sign with this fun Dollar Tree DIY project! This dollar store fall craft is so cute!             

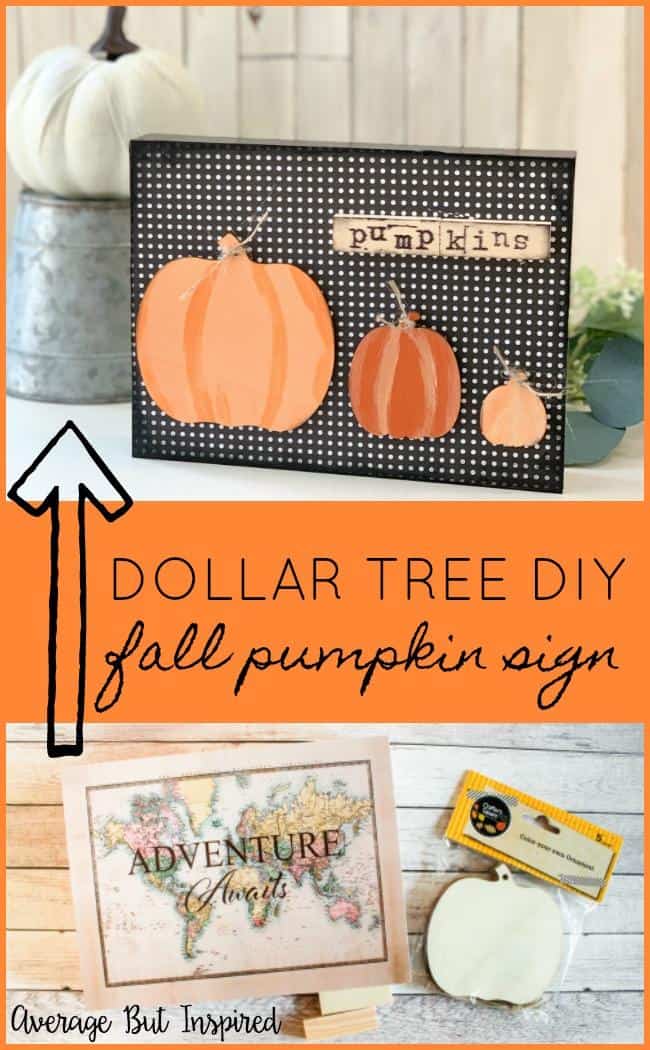
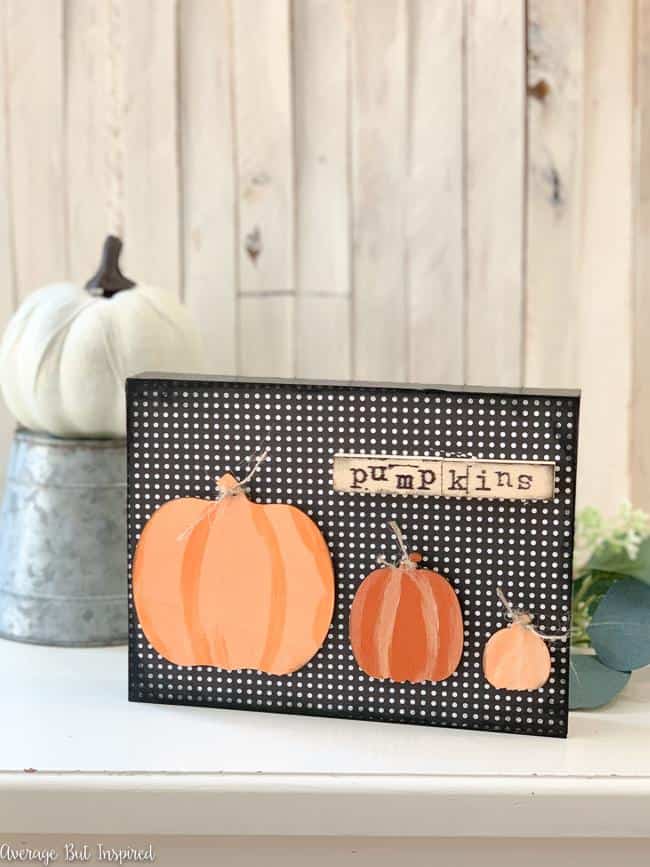
This cute pumpkin sign will stay out all fall – even through Halloween – because of the color scheme I used.  The great thing is that it can be customized however you want, so make this in any color to suit your taste or decor!

Supplies Used for This Dollar Tree Pumpkin Decor

Here’s what I used to make this fall sign:

  • Dollar Tree canvas artwork (any pattern or design will work!)
  • Dollar Tree “create your own ornament” wood pumpkin shapes
  • Dollar Tree DIY pumpkin craft stickers
  • Dollar Tree Jenga game (those are the wood blocks shown in the project)
  • Scrapbook paper
  • Scissors
  • Spray Adhesive
  • Acrylic craft paint in orange, white, and black
  • Paintbrush
  • Hot glue and hot glue gun
  • Letter stamps
  • Black stamp pad

Dollar Tree's fall craft items are adorable! Use them to create a cute fall sign that you'll have out all season.

How to Make a Fall Pumpkin Sign

First I painted the edges of the Dollar Tree canvas artwork black.  I used two coats of paint for this step.  Remember, you can use any color paint you like!  Transform a Dollar Tree canvas artwork into a cute pumpkin sign for fall.

Once the paint dried, I traced the shape of the canvas onto the back of a piece of scrapbook paper.  I cut that out and then sprayed the canvas and the back of the paper with spray adhesive.  I quickly pressed the scrapbook paper into place on the front of the canvas and trimmed any parts that stuck up over the edges of the canvas.  Use spray adhesive to fasten scrapbook paper to a canvas to create a pumpkin sign for fall.

Then I got to work painting the pumpkins!  I mixed up a few shades of orange by simply mixing basic orange and white acrylic paint.  I painted one of the Dollar Tree pumpkin ornaments and two of the DIY craft stickers.  Paint plain Dollar Tree pumpkin ornaments to create a cute pumpkin sign for fall.

After those pumpkins dried, I used one of the pieces of twine from the ornaments package and tied it around each of the pumpkins’ stems.  Then I used the hot glue gun to fasten them to the canvas.  I even hot glued the stickers because the adhesive wasn’t super strong and I didn’t want those pumpkins going anywhere!  Create a cute pumpkin sign for fall.

Next, I stamped the word “pumpkin” onto two of the Dollar Tree Jenga game blocks.  They’re the perfect little wood blocks for all kinds of projects!  If you don’t have letter stamps and/or a stamp pad, you could use the tiny letter stickers at Dollar Tree for this step!

Use stamps on Dollar Tree Jenga pieces to create a cute pumpkin sign for fall.

Finally, I hot glued the “pumpkins” piece into place and added a little black paint around the edges of both the word piece and the entire sign.  This gave a distressed look that I like!  Create a unique pumpkin sign for fall.

And that’s all it took to transform a canvas into an adorable piece of fall decor!  Make the perfect pumpkin sign with this fun Dollar Tree DIY project! This dollar store fall craft is so cute!

I’d love for you to share this pumpkin sign project with your friends, or pin it to Pinterest to help others find it!  

And, if you love fall crafting, check out some of my other great fall craft ideas in my holidays gallery!

-Bre

Filed Under: Crafts, Dollar Tree, Fall and Halloween, Holiday

DIY Dollar Tree Sunflower Wreath

August 11, 2019 by Bre 6 Comments

blank

Confession: I used to hate sunflowers.  Now recently I’ve started liking them.  I don’t know what’s happened to me!  I think I’ve begun to appreciate sunflowers because of the way they add color to yards and gardens at the end of summer.  And now, I have some faux sunflowers adding the same color to my back door because of this cute DIY Dollar Tree Sunflower Wreath I made! 

Create gorgeous end-of-summer decor with this DIY Dollar Tree Sunflower Wreath project! Make this pretty sunflower wreath for about $5.

Supplies Needed to Make a Dollar Tree Sunflower Wreath

Because this wreath was made almost exclusively with Dollar Tree supplies, it came together for $5! Can you believe it?  Here are the items I used:

  • Small grapevine wreaths
  • One bunch of faux sunflowers
  • Black and white polka dot ribbon
  • Faux feathers (purchased at Michaels)
  • Scissors
  • Hot glue and glue gun

How to Make a Dollar Tree Sunflower Wreath

I think the unique look of this wreath or door hanger is due to the fact that it uses three small grapevine wreaths to form a larger door hanging.  I just love having something unique on my door!

DIY Sunflower Wreath Step One: Cut Ribbon

Begin by cutting two pieces of ribbon to be about 6″ long. 

I love this sunflower wreath project that uses small grapevine wreaths for a unique look!

Sunflower Wreath Step Two: Form Loops with the Ribbon

Next, hot glue the ribbon around the top of one grapevine wreath and around the bottom of another grapevine wreath to form a loop.  Attach small grapevine wreaths together with ribbon.

Repeat this process so that you end up with three grapevine wreaths attached together with two pieces of ribbon. 

These grapevine wreaths form the base of a beautiful sunflower wreath.

Step Three: Attach the Sunflower Blossoms to the Wreath

Cut the sunflower blossoms off of a bouquet of Dollar Tree sunflowers.  There are approximately six sunflowers per $1 bouquet, and I used five blossoms on this wreath. 

Once the sunflower blossoms are cut off, glue them onto the grapevine wreaths in any manner you like. 

Use Dollar Tree sunflowers to make a beautiful end-of-summer wreath.

Step Four: Add Feathers to the Sunflower Wreath

Finally, add some feather accents around the sunflower blossoms, if you like!  I purchased these cute spotted feathers at Michaels last year and used them on this Thanksgiving Embroidery Hoop Wreath, too!  There are so many in the package that you can use them for lots of projects! 

Learn how to make a beautiful sunflower wreath in this post!

I love the natural touch they add to projects!

Step Five: Make a Bow to Hang the Wreath

Finally, cut a piece of ribbon about 12″ long and tie it into a bow.  Then, hot glue it to the top of the sunflower wreath for a finishing touch.  

And with that, your Dollar Tree Sunflower Wreath is finished! 

Create gorgeous end-of-summer decor with this DIY Dollar Tree Sunflower Wreath project! Make this pretty sunflower wreath for about $5.

The contrast of the bright yellow sunflowers with the natural grapevine wreath is so beautiful!  This is truly the perfect wreath to bridge the gap from summer to fall. 

Create gorgeous end-of-summer decor with this DIY Dollar Tree Sunflower Wreath project! Make this pretty sunflower wreath for about $5.

If you agree, I’d love for you to let me know in the comments and share this project on Pinterest or Facebook!  It means so much to me when you share my work.  

Happy crafting!

-Bre

Filed Under: Crafts, Dollar Tree

Vintage Tin Tile Wall Art: a Dollar Tree DIY

June 4, 2019 by Bre 3 Comments

blank

Last week was my daughter’s end of school year party, and I had to get some last minute supplies at Dollar Tree.  Of course some non-party related items just happened to pop into my cart, like a wooden board game and these new peel and stick tin tiles I found in the kitchen section.  After the party I got to work creating some vintage tin tile wall art with these supplies, and it turned out so cute!  blank

  Vintage Tin Tile Wall Art Supplies

I used a mix of items from Dollar Tree and craft supplies I had on hand:

  • Dollar Tree 3-in-1 Board Game
  • Dollar Tree peel and stick wall tiles
  • Dollar Tree twine
  • Dollar Tree foam brush
  • Dollar Tree flat push pins (optional)
  • Craft paint in brown and aqua
  • Stencil brush
  • Wooden beads
  • Hot glue
  • Scissors

How to Make Dollar Tree Vintage Tin Tile Wall Art

Don’t you just love when a project is too easy?  I know I do!  That’s definitely the case for this one.  Begin by painting the chess/checkers side of the game board how you like.  I used brown paint as a base coat so that it would hide the game board pattern and have a rustic look in the end.  A wooden game board from Dollar Tree is a perfect backer for signs, wall art, and more.

Once that coat of paint dried, I dry brushed a topcoat of aqua paint on top, leaving some of the brown base coat to show through.  Create beautiful vintage look tin tile wall art with supplies from Dollar Tree.

After that dried, I removed the tin tile decal and pressed it onto the game board.  Dollar Tree's removable tile wall decor pieces are great for creating vintage tin tile wall art.

Next, I strung wooden beads onto a piece of twine, knotted the ends, and hot glued the twine to the back of the game board.  Notice that I didn’t paint the back of the game board because I’m a lazy crafter.  Hot glue the beads and twine to the back of the game board to create a hanger for the vintage tin tile wall art.

I flipped it back over and pressed flat push pins into the board.  Because the board is thin, the sharp edges poked through the back.  I covered those with electrical tape that I had in the drawer, but something like the poster mounting ticky tack stuff at Dollar Tree would work great, too.  Adding push pins to the vintage tin tile wall art gives it the look of nails.

I dry brushed some of the aqua paint onto the push pin heads to give them the look of nails.  After that, this vintage tin tile wall art was finished!  Love it! This post shows you how to make your own vintage tin tile wall art with supplies from Dollar Tree. Seriously!

Create pretty tin tile wall art with supplies from the dollar store. You won't believe how easy it is!

I love the look of this copper patina version, but I saw silver tiles, too.  Those would look really cute with a distressed white finish all over.  These would also be awesome in a group of three or four – whether on individual boards or one large board.  The possibilities are endless!  Love this! Create beautiful vintage look tin tile wall art with supplies from Dollar Tree. It's so easy to create faux tin tile decor and this post shows you how to do it!

Can you believe what you can make with dollar store items?  I just love the challenge of creating something beautiful with bargain supplies!

-Bre

You May Also Like These Dollar Store DIY Decorative Plates

blank

Filed Under: Crafts, Dollar Tree

DIY Vase Filler Balls

May 21, 2019 by Bre 6 Comments

Create dollar store diy decorative ball vase fillers with surprising items!

My kids start summer vacation pretty soon, and while cruising Dollar Tree’s aisles looking for activities to keep them busy, I picked up some baseballs.  Unfortunately for my kids, I kept the baseballs and turned them into decorative vase filler balls.  They’re super cute and an inexpensive dollar store decor item you can make really quickly!  

Love this! See how she turned dollar store baseballs into gorgeous home decor! These decorative ball vase fillers can be customized to suit any style!

Supplies Needed to Make Decorative Vase Filler Balls

For this project, I purchased every single supply from Dollar Tree!  

  • Plastic baseballs 
  • Optional: floral foam ball multi-pack (I used this for smaller balls in my vase)
  • Decorative napkins
  • Mod Podge (Dollar Tree sells smaller containers of Mod Podge than the container I used, which I already had on hand)
  • Foam brush
  • Scissors

How to Make DIY Vase Filler Balls

This is a perfect project to make while watching TV because it is 100% mindless.  🙂 

Begin by cutting strips of decorative paper napkins.  (Check out another favorite post of mine where I used decorative napkins to create a beautiful trinket dish!)

Decorative paper napkins are transformed into gorgeous decor ball vase fillers in this fun post!

Next, spread a thin coat of Mod Podge onto part of a plastic baseball.  Don’t cover the whole baseball all at once or your hands will become incredibly sticky! 

Apply Mod Podge to a plastic baseball to create decorative ball vase fillers!

Pick up a strip of napkin press it onto the baseball. 

Repeat this process of applying Mod Podge and pressing napkin strips onto the baseball until the baseball is covered.  (NOTE: I removed the plain napkin liner from each strip before I applied the strips to the baseball, but that is optional.  I think the napkins pieces stick better if you remove the liner.) 

Learn how to make your own decorative ball vase fillers with supplies from Dollar Tree!

Yikes, I need a manicure . . . but getting back to the project – once the baseball is covered, set it aside to dry. 

After the napkin and Mod Podge combo has dried, cover the entire baseball with a thin coat of Mod Podge to seal the vase filler ball and push down any parts of the napkins that didn’t stick the first go round. 

Learn how to create your own decorative balls for decor and vase fillers! Paper napkins give a beautiful pattern.

I set the decorative balls on a sheet of wax paper so that they were easier to remove once dry.  A plastic trash bag would probably work well, too.  Don’t set them on a surface they might really stick to (like a paper plate), or you’ll end up ruining your DIY vase filler balls! 

Dollar store items are easily transformed into decorative ball vase fillers! This is an easy decor DIY that is made completely with Dollar Tree items.

These decorative balls are an awesome DIY vase filler, and they look great in a pretty bowl, too! 

Create beautiful decorative balls that are wonderful as vase fillers or centerpiece balls, by using supplies purchased at Dollar Tree!

I plan to put them in a lantern on my patio once it stops raining here. 

Use items from the dollar store to create beautiful DIY decorative ball vase fillers! This easy dollar store craft uses surprising items for a pretty project!

I’ve seen similar vase filler balls at my favorite stores starting at $10 – this set cost $3 (because I already had the Mod Podge and foam brush). 

Create dollar store diy decorative ball vase fillers with surprising items!

I love it when I get the look for less, and I guess I can use my savings to get my kids some baseballs they can actually play with.  🙂  

-Bre

Filed Under: Crafts, Dollar Tree

Dollar Tree Easter Craft: DIY Bunny Planters

April 1, 2019 by Bre 2 Comments

blank

This adorable Dollar Tree Easter craft is easy to make! Display this DIY bunny planter all spring long.

Sometimes life gets in the way of creative time, and that has definitely been the case for me recently!  I finally made it a priority over the weekend, and just LOVE this Dollar Tree Easter craft I whipped up: these darling DIY Bunny Planters!

These cute DIY Bunny Planters are made with dollar store supplies! Get the project tutorial for this cute Dollar Tree Easter craft in this blog post.

They are a speedy project, which is great when you don’t have a lot of leisure time.  Plus, they add a cute touch to your spring and Easter decor.

Supplies Needed to Make DIY Bunny Planters

This post contains affiliate links.  Please read my disclosure policy for more information.

  • Small white planters (originally purchased at Dollar Tree, but they don’t have them currently. You could also purchase terracotta pots and paint them white.)
  • Hot Pink multi-surface acrylic paint
  • Gray multi-surface acrylic paint
  • Small paint brush
  • Floral moss
  • Faux succulents
  • White felt
  • Pink felt
  • Fabric scissors
  • Multi-surface glue, like E6000 brand
  • Clothespins or craft clamps
  • Optional: bunny ear templates that you draw onto paper or card stock

Dollar Tree Easter Craft How-To: Instructions for Making DIY Bunny Planters

I started with the cutest little white planters that I got at Dollar Tree.  I just love them with their facets and iridescent shimmer!  They came in other colors, too, like pink and turquoise, but I think white is best for this project.  (Update: I don’t think Dollar Tree carries these anymore, but you could paint a flower pot white to make this craft or use a small white planter like this!)

Step One: Paint a Nose and Whiskers

I used a small paint brush to paint a pink nose and gray whiskers onto the planter.  I used multi-surface acrylic paint to make sure it adheres well!

Transform a plain dollar store planter into an adorable bunny planter! It's a great Easter craft. Get the project tutorial in this post.

If you don’t want the mess of paint and a paint brush, you could also use oil-based Sharpie markers. I love those things!

Step Two: Make a Bunny Ears Template

Next, I drew bunny ear templates onto scrap cardstock and cut those out.  I drew a large ear and a smaller ear. 

Love Dollar Tree spring crafts? Check out this adorable Dollar Tree Easter wreath!

Step Three: Create the Bunny Ears

Then, I used the larger ear template to cut out two white felt ears. 

I used the smaller template to cut out two pink felt ears. 

I didn’t draw on the felt – I just held the templates in place and carefully cut around them.

Cut out felt ears to make a cute DIY Dollar Store Bunny Planter that's perfect for Easter or spring.

Then, I glued one pink felt ear onto each white felt ear. 

These felt ears will become bunny ears in this darling DIY Dollar Store Bunny Planter project.

Step Four: Attach the Ears to the Planter

Next, I placed a thin line of multi-surface E6000 glue around the inner rim of the planter. 

I pressed the ears onto the glue, and held them in place temporarily with clothespins.  Once the glue hardened, I removed the clothespins. 

Clothespins hold the bunny ears in place while the glue is drying on these DIY Bunny Planters.

Step Five: Fill the Planter

I filled the planter with craft moss to help hold the faux succulent in place.  This stuff makes a mess, so have your broom or dust buster ready!  😉

Fill the DIY Bunny Planter with craft moss prior to adding the faux succulent.

And for the final touch, I placed a faux succulent into the planter. 

Learn how to make a darling DIY Bunny Planter for Easter or Spring in this blog post!

These little bunny planters make me so happy; I think they’re just darling!  They are a great spring or Easter craft project, and make for a sweet Easter hostess gift or addition to your spring decor!  

If you wouldn’t mind, I’d love for you to pin this Dollar Tree Easter craft project to Pinterest and help spread the love! 

So cute! Make these Dollar Store DIY Bunny Planters for Easter or spring! They're easy to make and such a cute spring craft!

Filed Under: Crafts, Dollar Tree, Easter, Holiday

My Favorite DIY Dollar Store Home Decor Ideas

February 5, 2019 by Bre Leave a Comment

blank

It’s no secret that I harbor a true love for Dollar Tree. It is definitely in my top five favorite stores! Because of that, I’ve shared many DIY Dollar Store Home Decor Ideas on my blog over the years.  Often those projects were seasonal or holiday-themed, but I’ve also created a fair amount of year-round dollar store decor projects, too. 

There are so many great DIY Dollar Store Decor Ideas in this post! It's so easy to make pretty home decor with items from the dollar store or Dollar Tree! #dollarstoredecordiy #dollarstoredecorating #dollartreedecorideas

Today I’m rounding up several of my favorite dollar store decor projects that will work for any time of the year, and I hope they inspire you to get creative at the dollar store!

DIY Dollar Store Home Decor Ideas

Make your home decor shine with these DIY dollar store decorating ideas! They're all affordable decor projects that don't look like they came from the dollar store.

Image for DIY Dollar Store Plates Decor

DIY Dollar Store Plates Decor

Transform plain dollar store plates into adorable wall decor that looks great hanging in your kitchen!

Image for Dollar Store Silver Tray Wreath

Dollar Store Silver Tray Wreath

A plain dollar store silver tray is transformed into a lovely wreath! Accent it with leaves for the fall, or flowers for the spring! The possibilities are endless.

Image for Dollar Store DIY Pizza Pan Magnet Board

Dollar Store DIY Pizza Pan Magnet Board

Make a dollar store pizza pan your new decorative organization piece! This post will show you how!

Image for Dollar Store DIY Salt and Pepper Shaker Bud Vases

Dollar Store DIY Salt and Pepper Shaker Bud Vases

Make dollar store salt and pepper shakers into beautiful bud vases! They'll add a decorative touch to any small space. They also look great as party decor!

Image for Dollar Store DIY Trinket Dish

Dollar Store DIY Trinket Dish

Keep your jewelry safe in a stylish DIY trinket dish made with dollar store supplies! Functional and fabulous!

Image for Dollar Store DIY Modern Metal Wreath

Dollar Store DIY Modern Metal Wreath

Dollar store metal wreath forms become the star of these easy DIY wreaths!

Image for Dollar Store Stained Glass Candles

Dollar Store Stained Glass Candles

Dollar store candles and permanent markers become beautiful stained glass candles in this fun project!

Image for Dollar Store Laundry Hamper to Burlap Basket

Dollar Store Laundry Hamper to Burlap Basket

Turn a dollar store laundry hamper into a pretty decorative basket for your home!

Image for Dollar Store DIY Tissue Paper Mug

Dollar Store DIY Tissue Paper Mug

A plain dollar store mug gets an injection of personality in this easy DIY!

Image for Dollar Store DIY Sea Glass Jars

Dollar Store DIY Sea Glass Jars

Dollar store candy jars become pretty decorative accents with paint and iridescent wax!

Image for Dollar Store DIY Earring Organizer

Dollar Store DIY Earring Organizer

Transform a dollar store splatter screen into a cute earring organizer. It's so easy!

Image for Vintage Tin Tile Wall Art: a Dollar Tree DIY

Vintage Tin Tile Wall Art: a Dollar Tree DIY

Surprising Dollar Tree supplies make for a charming piece of vintage-inspired wall art! Learn how to make a vintage look tin tile in this post!

Create dollar store diy decorative ball vase fillers with surprising items!

Dollar Store DIY Decorative Ball Vase Fillers

It's kind of crazy how expensive decorative ball vase fillers can be! Dollar Tree baseballs and paper napkins come together beautifully to create a lovely vase filler in this project. Customize the look with any napkin pattern or color!

Can you see yourself making any of these projects? Let me know which one is your favorite in the comments!
-Bre

You May Also Like This Post on The Best Craft Supplies to Buy at Dollar Tree!  

blank
10 Craft Supplies You Should Buy at Dollar Tree

Filed Under: Crafts, Dollar Tree, home decor

  • « Go to Previous Page
  • Page 1
  • Page 2
  • Page 3
  • Page 4
  • Page 5
  • Page 6
  • Interim pages omitted …
  • Page 8
  • Go to Next Page »

Primary Sidebar

Let’s Connect!

Hi, I’m Bre! Thanks for visiting Average But Inspired, where I show you how to work with what you’ve got to create a home you love.

Bre of Average But Inspired - a DIY and craft blog

Love DIY? Subscribe to Get Posts E-mailed!

How Can I Help You?

blank

How to Paint a Countertop to Look Like Marble!

blank

7 Tips for Hosting a Party on a Budget

blank

Limewash Stone Fireplace Makeover: Bye Bye Orange Stone Fireplace, Hello Neutral Stone Beauty!

blank

How to Paint Over Tile

Looking for Something?

Copyright © 2013-2022, Bre Eggert (Average But Inspired). All rights reserved.
  • Home
  • DIY
  • Crafts
  • Home Decor
  • Privacy Policy and Copyright Policy
  • Disclosures
  • Contact Me