• Skip to primary navigation
  • Skip to main content
  • Skip to primary sidebar
Average But Inspired logo - DIY and craft

Average But Inspired

Craft a home you love. DIY and craft tutorials.

  • About
    • Contact Me
    • Disclosures
    • Privacy Policy and Copyright Policy
  • DIY
    • Furniture
  • Crafts
    • Dollar Store Crafts
    • Seasonal
      • Patriotic & Summer
      • Valentine’s Day
      • Easter & Spring
      • Fall & Halloween
      • Christmas & Winter
  • Home Decor
    • Organization
  • Shop
    • DIY Guides
  • Home

Crafts

DIY Wood Plaque Picture Frames

February 10, 2016 by Bre 14 Comments

Love this quick and easy project! Turn wooden plaques from the craft store into adorable picture frames with scrapbook paper and paint. Get the full tutorial at averageinspired.com.

Wood plaques are a craft store staple.  They come in a million shapes and sizes, and are pretty darn cheap.  I always wondered what to do with them though; they seemed kind of pointless if you ask me.  That is until I had an idea to turn them into cute wood plaque picture frames with the help of some adorable patterned scrapbook paper and metallic paint.  And here they are as my entry for this month’s Monthly DIY Challenge!  Love this quick and easy project! Turn wooden plaques from the craft store into adorable picture frames with scrapbook paper and paint. Get the full tutorial at averageinspired.com.

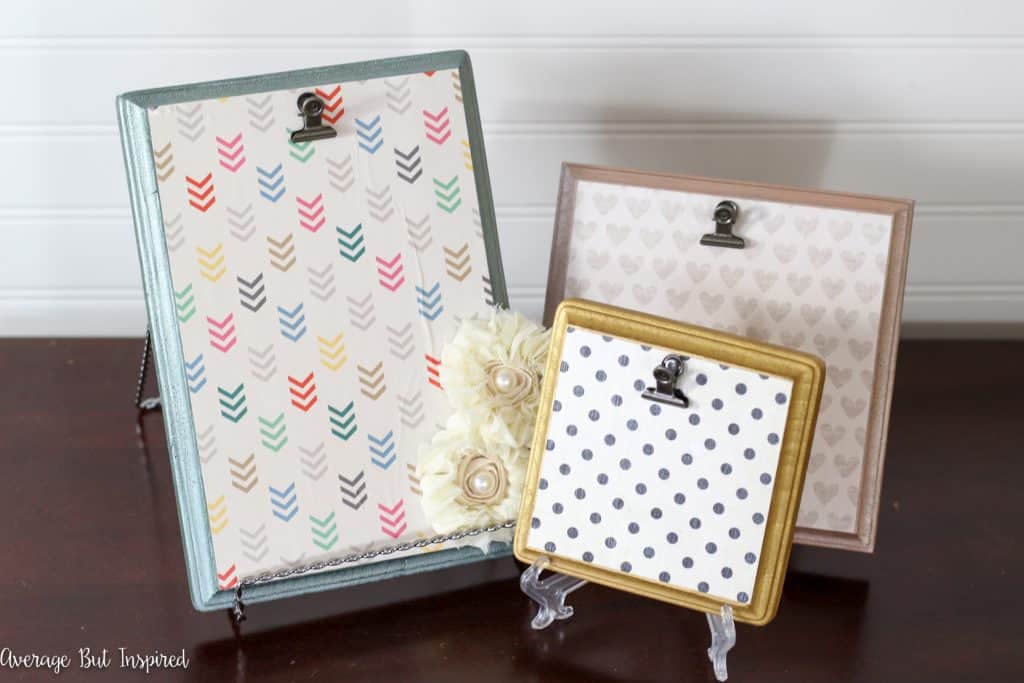
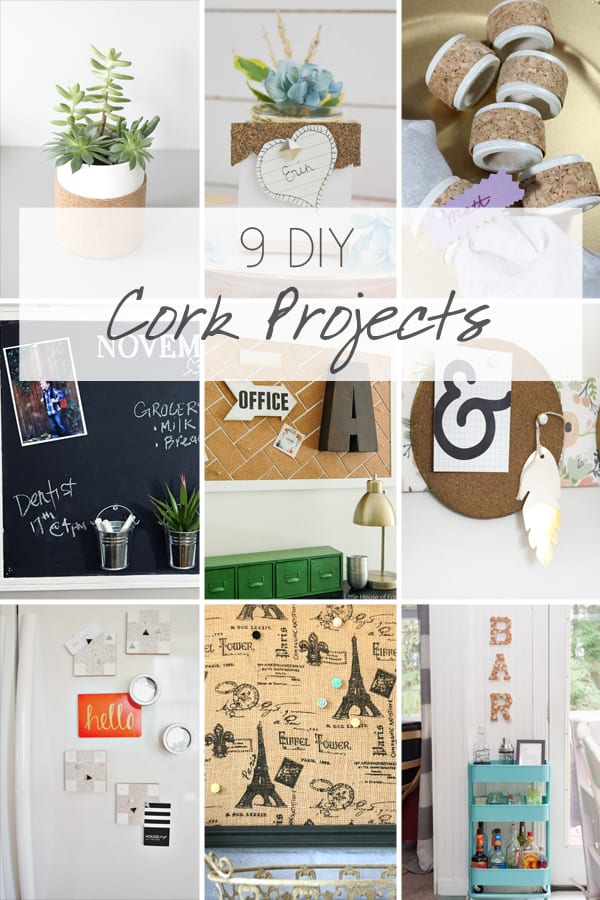
In case you’re unfamiliar with the Monthly DIY Challenge, each month some of my favorite blogger friends and I get together to create different projects that revolve around a common item or theme.  In the past, we’ve used things like wooden crates, cork, and plumbing pieces.  This month we all were challenged to use metallic paint.  You can check out all of the projects by clicking the links at the bottom of this post, but first, here’s a sneak peek!  Check out how 9 crafty bloggers used metallic paint in these amazing and easy projects!

Supplies Needed to Make Wood Plaque Picture Frames

This post contains affiliate links.  To read my full disclosure policy, please click here.

  • Unfinished wooden plaques in shapes and sizes of your choice
  • Patterned scrapbook paper (the thicker the better)
  • Metallic craft paint (I used Dazzling Metallics in Dark Patina; Dazzling Metallics in Mink Pearl; and Americana Multi-Surface in Gold)
  • Mod Podge in Glossy Finish
  • Foam Brush
  • Scissors or Paper Cutter
  • Small metal clips
  • Elmer’s ProBond Glue
  • Sawtooth hangers and/or small easels

Directions to Make Wood Plaque Picture Frames

First, sand any rough edges on your wood plaques.  Mine had crazy splinters all over the place, so be careful!  Once you’ve done that, wipe off any sawdust.  Love this quick and easy project! Turn wooden plaques from the craft store into adorable picture frames with scrapbook paper and paint. Get the full tutorial at averageinspired.com.

Next, measure the front surfaces of your wood plaques and cut the scrapbook paper slightly smaller than those dimensions.  Using a paper cutter makes this step so easy!  If you don’t have one but craft regularly, you need to get one!  I have had mine for over ten years and use it all the time!

Then paint the beveled edges of the wood plaques with the paint colors of your choice.  I used metallic paint because that was the theme of this month’s challenge, and I LOVE the colors I chose!  Metallic paints come in so many more colors than your typical silver and gold.  I am totally obsessed with this Mink Pearl color.  Anyway, make sure to paint a little bit around the edges of your plaques’ front surfaces so that unfinished surface will not show where your paper is a little smaller.  Love this quick and easy project! Turn wooden plaques from the craft store into adorable picture frames with scrapbook paper and paint. Get the full tutorial at averageinspired.com.

After the paint has dried, use a clean foam brush to apply a thin, even layer of ModPodge to the front surface of your plaques.  CAREFULLY put the scrapbook paper into place on the plaques.  Take care to put the paper down smoothly, and try to avoid getting any wrinkles or bumps in the paper.  You want it as smooth as you can get it!  If you do get any bumps or wrinkles, try to smooth them very carefully.  The thinner your paper the more likely you are to rip it.  Love this quick and easy project! Turn wooden plaques from the craft store into adorable picture frames with scrapbook paper and paint. Get the full tutorial at averageinspired.com.

After the bottom layer of ModPodge has dried, apply a thin, even layer of ModPodge to the top of the scrapbook paper.

Once that has dried, use a little of the Elmer’s ProBond glue to attach a metal clip to the top of each plaque.  Hot glue will not work for this; you need something sturdier!  This ProBond glue is my absolute favorite for bonding different types of objects together.  It works fabulously!  Love this quick and easy project! Turn wooden plaques from the craft store into adorable picture frames with scrapbook paper and paint. Get the full tutorial at averageinspired.com.

Finally, attach a sawtooth picture hanger to the back of each plaque if you want to hang them on the wall.  If you plan to display them on a table, simply pop them onto tabletop easels.  Love this quick and easy project! Turn wooden plaques from the craft store into adorable picture frames with scrapbook paper and paint. Get the full tutorial at averageinspired.com.

And that’s it!  These are a fast project, but they’re really cute.  Love this quick and easy project! Turn wooden plaques from the craft store into adorable picture frames with scrapbook paper and paint. Get the full tutorial at averageinspired.com.

You could make them so festive for holidays with themed scrapbook paper.  You could also use them in a different way, such as to hold notes or small printables.  Love this quick and easy project! Turn wooden plaques from the craft store into adorable picture frames with scrapbook paper and paint. Get the full tutorial at averageinspired.com.

Thanks for checking out how I used metallic paint on my wood plaque picture frames for this edition of the Monthly DIY Challenge.   Now that you’ve seen what I did, I hope you’ll visit my friends’ posts, too!  Then make sure to pick up some metallic paint and get to work on your own shiny project!

blank
How to Make an Oversized Faux Metallic Alphabet Letter
blank
DIY Wood Photo Plaque
blank
DIY Fixer Upper-Inspired Dutch Tulip Crate
blank
Wood Plaque Picture Frames
blank
How To Create A Faux Galvanized Metal Finish
blank
Easy Gold Poster Clips
blank
Faux Aged Metal Storage Box
blank
Copper Dipped Planter Pots
blank
DIY Gold Scalloped Vase
InLinkz.com
Also, be sure to check out this other post on Creative Ways to Display Photos, which I think you’ll love!  Creative Photo Displays to Make

Filed Under: Crafts

Personalized Peg Doll Family Craft

February 5, 2016 by Bre 4 Comments

blank

Have you guys ever seen those adorable customized peg dolls that you can buy on Etsy and other creative places like that?  I have been obsessed with the idea ever since I saw it, so of course I had to try my hand at making my own peg doll family.  It was the MOST FUN craft project I’ve done in a while, and I love my little personalized peg doll family!  I bet you’ll want to make one, too!

This is so cute! A DIY personalized peg doll family is a fun project! It makes a great addition to a gallery wall and is a perfect, thoughtful gift for any family!

It’s the perfect little dose of happiness over my kitchen sink.  And very realistic too, I might add.  Right down to the womanly hairstyle my husband has and my long flowing ponytail.  (OK, I wasn’t as skilled with the paintbrush as I’d hoped.)This is so cute! A DIY personalized peg doll family is a fun project! It makes a great addition to a gallery wall and is a perfect, thoughtful gift for any family!

Supplies Needed to Make a Personalized Peg Doll Family

Some of these links are affiliate links.  To read my full disclosure policy, please click here.

  • Wooden peg dolls in the quantity of your family and in varying sizes (Here’s a family with five kids for a bargain price!!)
  • Acrylic paints in several colors (think about hair color, eye color, and clothing choices for your family members)
  • Artist paintbrushes in a variety of sizes
  • Baker’s twine
  • Fabric scraps
  • Backer for your peg doll family (I used a galvanized metal heart from Michaels)
  • Elmer’s ProBond Advanced glue

Instructions for Making a Personalized Peg Doll Family

So this is really a pretty easy project.  As long as you have a steady hand and some patience, you can do this.

I started by painting very simple colors on my peg dolls.  The girls got one solid color (for dresses), and the boys got two colors (pants and shirt).  This is so cute! A DIY personalized peg doll family is a fun project! It makes a great addition to a gallery wall and is a perfect, thoughtful gift for any family!

Once the “clothes” dried, I painted on some embellishments, like buttons, a collar and ruffle on my peg daughter’s dress, etc.  This is so cute! A DIY personalized peg doll family is a fun project! It makes a great addition to a gallery wall and is a perfect, thoughtful gift for any family!

After that, things started to get real.  I had to paint eyes and hair.  The girl hairstyles weren’t so bad.  I gave myself a nice flowing ponytail like you see on models, and my peg daughter got a cute little bob.  Very stylish.  (Very unrealistic.)

Then I painted my peg husband’s hair.  He, unfortunately, got a pseudo-bob / mullet look.  Kind of like the time he had me cut his hair in law school when we had no money and he could not pay for a real hair cut.  So I guess his is somewhat realistic.  My peg son’s turned out a little better.  Lucky him.  This is so cute! A DIY personalized peg doll family is a fun project! It makes a great addition to a gallery wall and is a perfect, thoughtful gift for any family!

I thought my peg family was just adorable, until I realized I had painted my own face on sideways.  See, this particular peg doll I used had a special place for the face (it was lighter in color than the rest of the head portion of the peg doll), and I managed to paint half of the face on that designated spot and the other half off of it.  So if you do this project, make sure you look for designated face spots on your peg dolls.  You’re welcome.

Once everything was dry, I used my favorite glue to adhere everything to the galvanized metal heart.  This stuff sticks anything to anything.  It’s the best!This is so cute! A DIY personalized peg doll family is a fun project! It makes a great addition to a gallery wall and is a perfect, thoughtful gift for any family!

After my peg family was firmly in place, I glued some baker’s twine to my galvanized metal heart.  This is so cute! A DIY personalized peg doll family is a fun project! It makes a great addition to a gallery wall and is a perfect, thoughtful gift for any family!

Then I cut fabric scraps and glued them on to make a little pennant banner.  Adorable.  This is so cute! A DIY personalized peg doll family is a fun project! It makes a great addition to a gallery wall and is a perfect, thoughtful gift for any family!

Aren’t we a cute family?

This is so cute! A DIY personalized peg doll family is a fun project! It makes a great addition to a gallery wall and is a perfect, thoughtful gift for any family!

So even though we have our flaws, such as strange hairstyles and faces on the side of our heads, we’re a pretty good-looking family.

And if you want a fun project to make for yourself or as a gift for someone else, I would recommend making a personalized peg doll family of your own.  It has the potential to become your favorite family “photo” yet!

This is so cute! A DIY personalized peg doll family is a fun project! It makes a great addition to a gallery wall and is a perfect, thoughtful gift for any family!

-Bre

Filed Under: Crafts

17 Amazing Chalk Paint Crafts {That Aren’t Furniture}

February 1, 2016 by Bre 8 Comments

blank

Oh, chalk paint; one of my greatest loves.  My heart skips a beat when I get a new container of it or start new chalk paint projects.  For real.

If you haven’t hopped on the chalk paint bandwagon yet, I’m thinking it could be because you think it’s really only used for furniture.  And let’s be honest – painting a piece of furniture can be a little scary.  

But the good news is that because chalk style paint is the most fabulous type of paint on earth, there are tons of chalk paint craft ideas out there for those who do not want to paint furniture!

And I searched high and low to gather up some of the best and most creative chalk painting projects to help inspire you to try the stuff out (or to use up your leftover paint)!  

So many great ideas of ways to use up leftover chalk paint or to get comfortable using it! These non-furniture chalk paint projects will get you inspired to get painting!

Why do Crafters Use Chalk Paint?

There are so many reasons chalk paint is perfect for crafters!

First off, chalk paint coverage is exceptional. You can typically get the look you want with one coat of paint (two at the most), when other types of paint take multiple coats. And . . . no primer is needed with chalk paint!

In addition, chalk paint has super adhesion properties, which makes it so easy to paint over almost any type of surface (even plastic)!

Can I Make My Own Chalk Paint?

If you don’t happen to have any chalk paint on hand, no worries! You can turn latex paint or acrylic paint into chalk paint! And, you only need a few simple ingredients.

To make your own chalk paint, simply mix together 1 cup of paint, 1 tablespoon of calcium carbonate, and 2 tablespoons of water. Stir these items together VERY WELL, and you’ll have your own chalk paint!

If you want to make less than one cup of chalk paint, simply reduce the ratios of ingredients.

Do You Have to Seal Chalk Paint Used on Crafts?

The answer to whether you have to seal chalk paint used on crafts is: it depends!

If you’re painting something that won’t be touched or used a lot (say, for example, a picture frame), you probably don’t need to seal it.

If you’re painting something like pencils or a serving tray, you will want to seal the chalk paint. Polycrylic (non-yellowing sealer) is always a great choice for sealing chalk paint craft projects.

Creative Chalk Paint Crafts Ideas

Now that you know a little bit more about chalk paint, I just know you’re going to love these chalk paint crafts ideas and chalk paint DIY projects! 

To get the full tutorials for any of these projects, just click the link to be taken to the original blog post!  Also, these projects are PERFECT for doing with spray chalk paint (check out my review of chalky finish spray paint!).

17 Amazing Chalk Paint Crafts

Try one or all of these chalk paint crafts! These creative painting projects will help you use up leftover paint, or get started using chalk paint!

Chalk paint pillow

Chalk Painted Stripe Pillow

This chalk paint DIY idea is a great way to update or dress up a throw pillow! That's right: you can paint fabric with chalk paint! See how White House Black Shutters did it in her project tutorial.

Chalk paint crafts ideas: chalky paint vase

Chalk Paint Vase Makeover

I bet you have lots of leftover florist vases sitting in a cabinet somewhere, don’t you?  Give them a breath of new life with some chalk paint like Pet Scribbles did!

Average But Inspired shows you how to give a grapevine wreath a totally unique look with chalk paint!

Chalk Painted Grapevine Wreath

Grapevine wreaths are a staple in wreath making, but sometimes you don't want the wreath to be brown! To help my grapevine wreath stand out, I used chalk paint to actually paint the wreath! Spoiler alert: you have to water down the paint to make this work. I share all the grapevine wreath tips and tricks in this post.

chalk paint frames

Chalk Paint Frames

These fancy gold frames were painted with chalk paint, and then turned into gorgeous chalkboards.  You could keep yours as picture frames or do what Christy did to give them a different purpose!

Chalk painted candlesticks

Chalk Paint Candlesticks

Update candlesticks in minutes with chalk paint! Read more to see how Roxanne painted these candlesticks without distressing them, and how she sealed them.

Chalk painted pencils

Chalk Paint Pencils

You'll have the write stuff if you give your pencils an adorable, custom look with chalk paint like Blooming Homestead did!

Thrift store trays get an update with chalk paint

Chalk Painted Silver Trays and Plates

Plates and serving platters are a thrift store staple!  Freshen them up or antique them with chalk paint like Canary Street Crafts did, and you have unique wall decor in an instant!

Paint a lamp with chalk paint

Chalk Painted Lamp Makeover

Give an old lamp a new look with a coat or two of chalky paint.  So much cheaper than buying a new one! Would you guess that this was once a dated shiny brass lamp?

Paint a basket with chalky paint

Chalk Painted Basket

Baskets are perfect candidates for a makeover with chalky paint!  Follow Nicole’s tutorial to achieve a washed look on any old basket you have lying around.

Paint garden pots with chalky style paint

Chalk Paint Garden Pots

Add some color to the garden or porch with chalk painted pots!  Our Southern Home fills you in on how to properly seal them so that they will withstand the elements.

Create custom artwork with chalky style paint

DIY Sign or Art with Chalk Paint

If you’ve got a plain piece of scrap wood lying around, turn it into a special work of art for your home with some chalky paint.  Emily from Table and Hearth made a special anniversary gift for her husband!

Chalk paint crafts like painted trays are great for beginners

Chalky Finish Paint Serving Trays

A plain wood tray doesn’t have to be plain if you give it a color injection with chalk paint!

Chalk paint a jewelry box

Chalk Paint Jewelry Box

Such a perfect project to use up some leftover chalk paint!  Plain wooden jewelry or keepsake boxes are a great makeover candidate for a little bit of paint.

Use chalk paint to update a mirror

Chalk Painted Mirror Frame

This project inspired me to repaint the mirror hanging in my foyer!  It was time for an update!

Chalk paint mason jars for a fun look

Mason Jars Painted with Chalk Paint

What could be easier than chalk painting some mason jars and using them as decorative objects around the house?  ModPodge Rocks blog shows you how and gives some great tips, too.  The options for mason jars are endless!

Chalky style paint on a shutter

Repurposed Chalk Painted Shutter

It’s easy to upcycle an old shutter or door with chalk paint!  Use it as a decorative accent or pop on some baskets and turn it into a functional piece like Brepurposed did!

So cool! You can easily customize a plain magnet board, like the SPONTAN from IKEA, with chalk paint!

Chalk Painted Magnet Board

Turn a plain magnet board from Ikea (or anywhere else) into a piece of functional art for any room with chalk paint!

So are you ready to put your paint brushes to work?  I hope these chalk paint crafts and chalk paint projects inspire you to get painting!

Bre

Filed Under: Crafts

10 Dollar Tree Craft Supplies You Need (in 2025!)

January 18, 2016 by Bre 99 Comments

Here are the best Dollar Tree craft supplies to buy in 2023!

Here are the best Dollar Tree craft supplies in 2025, no matter where you live or how “good” (or “bad”) your Dollar Tree store is!

One of my favorite things to do is wander the aisles of Michaels to see what adorable, new craft supplies they have.  With every trip, my cart ends up with lots of fun finds and I leave with many new project ideas in mind.

But truth be told, there are certain craft supplies that I do not purchase from Michaels because I can get them from Dollar Tree for less (in some cases for a lot less).  

Of course people have quality concerns about Dollar Tree craft supplies, but I’ve personally tested all of these products time and again and can vouch for them!

That’s why I’m spilling my secrets on 10 Dollar Tree Craft Supplies you can’t afford to skip!  Follow this list and you are guaranteed to save money!

Then you can buy more of those cute supplies at Michaels or Hobby Lobby!

Save yourself lots of money with this post on the 10 craft supplies you should buy at Dollar Tree! These items are so much cheaper than at craft stores!

This post contains affiliate links.  Please read my disclosure policy for more information.

Do all Dollar Tree stores sell the same craft supplies?

All Dollar Tree stores sell craft supplies, but some sell more than others.

In this blog post, I share the best dollar store craft supplies that are available at all Dollar Tree stores. No matter where you live or the size of your store, you should be able to buy these crafting items!

Also, Dollar Tree has a large craft section online! Most items must be purchased in bulk, but that works if you’re crafting for an event or gifts!

What are the Best Dollar Tree Craft Supplies?

When stocking up for your next craft project or to add to your craft stash, these dollar store craft supplies are the ten must-have crafting supplies.

1.  Dollar Tree Glassware: Vases, Mason Jars, and Candle Holders

The selection of glassware at Dollar Tree is ah-ma-zing.  

There are tons of shapes and sizes of vases, mason jars, glass jars, candle holders – you name it!  

Comparable glassware at a craft store typically costs five times as much.

This list of ten craft supplies you should be buying at Dollar Tree is great! Hopefully it will save you a lot of money on your next project. Glass vases are a great Dollar Tree craft supply.

I’ve used glassware from Dollar Tree to create sand art terrariums, etched glass votive holders, and cozy sweater gift jars, among other things.  

I also use all different sizes of their vases and glassware for fresh flowers at parties.

2.  Dollar Tree Twine (Jute Twine, Bleached Twine, and Baker’s Twine)

Jute twine adds a perfect rustic touch to any project, while bleached twine and baker’s twine can definitely add a cute and whimsical feel to a craft.  Dollar Tree has every type of twine you could need or want!

Find three packs of twine in the automotive aisle, and multi-packs of colored baker’s twine in the craft aisle. Seasonal colors of baker’s twine can sometimes be found with holiday items.

Twine is one of the best Dollar Tree craft supplies! This post gives you ten craft supplies you should be buying at Dollar Tree. Hopefully it will save you a lot of money on your next project.

I have used twine from Dollar Tree on my vintage tin tile wall decor,  cozy sweater gift jars, printable glitter glue valentines, and moss bunny topiaries, among other things! 

Baker's Twine in many different colors is one of the best Dollar Tree craft supplies to buy.

Looking for Dollar Tree Craft Ideas? Check out my Dollar Tree Crafts Gallery!

3.  Dollar Tree Floral Foam

Oh my gosh.  Floral foam is SO expensive when you buy it at the craft store.  And I can’t figure out why.  

But at Dollar Tree it’s just $1.75.  And it comes in lots of shapes and sizes, too!

Floral foam is much less expensive when purchased at Dollar Tree. Use floral foam for many crafts and save money over buying it at a craft store.

Now let me tell you I am not doing a lot of floral arranging over here, but floral foam is really great for building height in projects or stabilizing items within a container.  

I have used Dollar Tree’s floral foam in my moss bunny topiaries and patriotic paper straw centerpiece.  It’s great.

4.  Glitter

If you’re a crafter then you probably love glitter (until you have to clean it up).  

For something so tiny it can be kind of pricey though, you know?  That’s why I like to purchase it at Dollar Tree.  

They typically have a lot of colors in the craft aisle, and they come in packages or containers that have enough to get the project done without leaving me with a ton left over to store.

Dollar Tree sells glitter, and it is one of the best Dollar Tree craft supplies.

Their glitter glue is also awesome for projects for adults and kids alike!  I have used Dollar Tree glitter or glitter glue on my glitter glue valentines.

5.  Contact Paper or Shelf Liner for Cricut Crafts

Most of you probably don’t think of contact paper or shelf liner as a craft supply, but it is awesome for making stencils on an electronic cutting machine (like a Cricut) or even by hand!

And it is half the price at Dollar Tree than at the hardware store or a big box store!

Contact paper or shelf liner is a great product to buy at Dollar Tree for Cricut crafts.

I have used Dollar Tree contact paper on projects like my DIY Modern Desk (that I BUILT myself!), child’s rocking chair, friendly stool makeover, and etched glass votive holders.

6.  Dollar Tree Clothespins

Clothespins are another product that might seem like a strange craft supply, but you see them ALL over the craft stores.  And they are really versatile for crafting – from hanging banner pieces to making clips for signs or frames – they can be used in many ways.  

At Dollar Tree you get a pack of 36 for $1.25, and you can find them in the home improvement aisle.

Clothespins are a Dollar Tree craft supply that is much less expensive than at a craft store.

I have used Dollar Tree clothespins on my DIY Christmas card holder and my magnetic chip clip holder.  And of course I have some of them on my drying rack in the laundry room.

7.  Dollar Tree Foam Board

If you have kids of school age then you know that foam board can be kind of expensive for what you’re getting.  Hello, it’s a glorified poster board!  

That’s why it’s so great to purchase it at Dollar Tree.  You will pay at least three times more at another store.

Dollar Tree sells foam board for much less than other stores. Foam board is one of the ten best Dollar Tree craft supplies.

I have used Dollar Tree foam board in my Mr. and Mrs. moss bunny topiaries, as well as other projects I have not blogged here.  

If you want to check out the queen of foam board projects, you need to visit 3 Little Greenwoods because Ashley can turn a foam board into just about anything.  Search her site and you’ll see what I mean.

8.  Tissue Paper

Of course, tissue paper is great for wrapping gifts, but it’s also a good product for crafting.  

Dollar Tree sells 35 pieces of colored tissue paper for $1.25, and larger packs of white tissue for the same price.  It’s the same quality as tissue paper I’ve purchased elsewhere and is not overly flimsy.

I have used tissue paper on my Tissue Paper Coffee Mugs, and think it would work great on home decor crafts, too!

9.  Dollar Tree Popsicle Sticks or Craft Sticks

I know that popsicle sticks are generally more of a kids craft item, but I ALWAYS use them as paint stirrer sticks in my smaller chalky paint containers, as glue applicators, or as resin stirring sticks. I keep craft sticks on hand at all times!

Popsicle sticks are a wonderful Dollar Tree craft supply. Use popsicle sticks for paint stirring, resin crafts, and more.

I also used them in this “LOVE” popsicle stick craft that my daughter made a couple of years ago (pardon the photography; this was when I was still using my phone to shoot blog photos.).  

Popsicle sticks are dirt cheap at Dollar Tree and a smart thing to have on hand!

10.  Decorative Tape (Washi Tape, Duct Tape)

Finally, decorative tapes like washi tape and patterned duct tape are a great thing to buy at Dollar Tree!  $1.25 is so much less than you pay at the craft store!

I don’t have any blogged projects that use washi tape or duct tape, but I have purchased these items from Dollar Tree and can attest that they work just as well as others that I’ve purchased elsewhere.

11.  BONUS CRAFT SUPPLY: Paint Brushes

I was so pumped to find 8 packs of foam brushes and synthetic bristle paint brushes at Dollar Tree this week!  The prices on these brushes is so much lower than you pay at the craft store or home improvement store!  Get some! 

A reader also gave me a tip that the $1.25 makeup brushes at Dollar Tree work great for Mod Podge or decoupage.  Keep that in mind as well!

Foam paint brushes from Dollar Tree are a great craft supply to have on-hand.

I hope you found this post helpful!  If you did, I’d really appreciate if you’d pin this image on Pinterest or share the post on Facebook or somewhere else!

No matter how "good" or "bad" your Dollar Tree store is, this post will give you the best Dollar Tree craft supplies to buy! These are craft supplies available at all Dollar Tree stores.

And, now that you’ve seen my list of craft supplies that you should be buying at Dollar Tree, what do you think?  Do you have any others to add?  Comment below!

Then, check out the newest post on Dollar Tree Craft Supplies, which has TEN MORE CRAFT SUPPLIES YOU MUST BUY AT DOLLAR TREE!

Filed Under: Crafts, Dollar Tree

DIY Etched Glass Candle Holders

December 1, 2015 by Bre 34 Comments

DIY etched glass votives are such a GREAT gift! They're easy to make and inexpensive. Get the full tutorial here.

Glass etching is such a fun and impactful craft! Learn how to make these DIY etched glass candle holders with dollar store supplies. They look much more expensive than they are!

The season of giving is upon us, and at times, that can be overwhelming!  So many people to shop for and so much money to spend!  Luckily, I have an AWESOME DIY gift idea for you that is inexpensive to make but so fun, too!  

DIY etched glass candle holders are a really simple project, and they can actually be used in a few different ways (which I’ll fill you in about below).  

DIY etched glass candle holders are such a GREAT gift! They're easy to make and inexpensive. They can also be gifted as makeup brush holders or vases. Get the full tutorial here.

Supplies Needed to Make Etched Glass Candle Holders

These are the supplies I used to make the etched glass candle holders shown in this post. Feel free to substitute anything to create a project of your own!

Some of these links are affiliate links. Please read my disclosure policy for more information.

  • Small square candle holders
  • Armour Etch glass etching cream
  • Plastic knife
  • Rubbing alcohol
  • Cotton balls
  • Electronic cutting machine (like the Cricut Joy) and removable vinyl or contact paper. Alternatively, try Christmas glass etching stencils.
  • Paper towels
  • Vase filler stones
  • Votive candles

Glass Etching Tutorial

First up, clean the glass candle holder to make sure it’s free of any oils or residues.  Gently wipe it with a cotton ball that’s been soaked in rubbing alcohol and let it dry.  

DIY etched glass candle holders are such a GREAT gift! They're easy to make and inexpensive. They can also be gifted as makeup brush holders or vases. Get the full tutorial here.

Next, if you’re creating your own stencils on an electronic cutting machine, like a Cricut, make your designs and measure them to fit the front of the glass vase.

Simple shapes are best.  I used seasonal silhouettes, state shapes, and monograms.  Mine were just about 2″ wide and high.  

Cut them from removable vinyl or contact paper, and press them onto the glass.  Make sure they’re firmly pressed down along all edges!  

DIY etched glass candle holders are such a GREAT gift! They're easy to make and inexpensive. They can also be gifted as makeup brush holders or vases. Get the full tutorial here.

If you’re going to do your etching with a premade glass etching stencil, make sure to follow the directions on the stencil package.

Apply the glass etching cream, using the plastic knife or palette knife, and make sure to cover the entire area to be etched.  

DIY etched glass candle holders are such a GREAT gift! They're easy to make and inexpensive. They can also be gifted as makeup brush holders or vases. Get the full tutorial here.

Let it sit according to the directions on the package (mine took about 15 minutes).

After the proper amount of time has passed, use the plastic knife or palette knife to remove the etching cream from the glass.  The directions on my etching cream said I could reuse that cream, so I put it back into the container.  

Rinse off the excess etching cream and gently pat dry with a paper towel.  Pop in your votive candles and enjoy!  

I Think You’ll Enjoy These Other Christmas Crafts, Too!

DIY Jingle Bell Garland

DIY Holiday Simmer Pot Gift

I also filled some of the space with floral accent gems, but that’s optional.

This was my first time using glass etching cream, but I am OBSESSED.  It is like magic in a jar!  I honestly did not think it would work, but it did, and I love it!  

One good thing to note is that the etching is dishwasher safe, too!  

DIY etched glass candle holders are such a GREAT gift! They're easy to make and inexpensive. They can also be gifted as makeup brush holders or vases. Get the full tutorial here.

I will be giving my DIY etched glass as votive candle holders this holiday season, but I think you could easily give them as makeup brush holders or vases, too!

DIY etched glass candle holders are such a GREAT gift! They're easy to make and inexpensive. They can also be gifted as makeup brush holders or vases. Get the full tutorial here.

Pretty cute, huh?  

DIY etched glass candle holders are such a GREAT gift! They're easy to make and inexpensive. They can also be gifted as makeup brush holders or vases. Get the full tutorial here.

Filed Under: Christmas, Crafts

DIY Cork Napkin Ring Place Cards

November 11, 2015 by Bre 16 Comments

Hello there!  Happy Monthly DIY Challenge day!  For those of you who are new here, the Monthly DIY Challenge is when a group of awesome bloggers and I get together and create projects that center on a common product or theme.  This month we’re all using cork to create unique projects that you can do, too!  Each project is linked at the bottom of this post!  But first, here’s a sneak peek!  9 bloggers share their awesome ideas for using cork. Check out the tutorials and make some cork projects of your own!

Since entertaining season is right around the corner, I used cork to make cork napkin ring place cards.  They’re a quick project that add a unique touch to any table!  DIY cork napkin ring place cards pull double duty by keeping napkins in place and telling guests where to sit! Learn how to make them with this quick and easy tutorial.
[Read more…] about DIY Cork Napkin Ring Place Cards

Filed Under: Crafts

  • « Go to Previous Page
  • Page 1
  • Interim pages omitted …
  • Page 14
  • Page 15
  • Page 16
  • Page 17
  • Page 18
  • Interim pages omitted …
  • Page 21
  • Go to Next Page »

Primary Sidebar

Let’s Connect!

Hi, I’m Bre! Thanks for visiting Average But Inspired, where I show you how to work with what you’ve got to create a home you love.

Bre of Average But Inspired - a DIY and craft blog

Love DIY? Subscribe to Get Posts E-mailed!

How Can I Help You?

blank

How to Paint a Countertop to Look Like Marble!

blank

How to Paint Over Tile

blank

How to Paint a Door to Look Like Wood (It’s Easier Than You Think!)

blank

Limewash Stone Fireplace Makeover: Bye Bye Orange Stone Fireplace, Hello Neutral Stone Beauty!

Looking for Something?

Copyright © 2013-2022, Bre Eggert (Average But Inspired). All rights reserved.
  • Home
  • DIY
  • Crafts
  • Home Decor
  • Privacy Policy and Copyright Policy
  • Disclosures
  • Contact Me